 elixxier – Photo Blog Light settings and lighting structures for studio and outdoor photography. Tips and tricks for set.a.light 3D – The photo studio and light simulation for photographers.

You can quickly find a pretty photo on the internet – but how did the lighting setup look like?
Let’s take a closer look at a portrait together and think about how we can trace back to the matching lighting setup from here.
Meaning, we want to detect the lighting set by reading the finished image and find out how the studio and lighting setup could have been arranged.
How do you usually prepare yourself for an imminent photo shoot? Certainly you do some research und try to find as many sample images as possible that resemble your own image idea. The images found often times help to refine your own image idea and provide additional impulses for further enhancement.
- Find image idea
- Look for a suitable model and appoint a date for the shoot
- Think about clothes and styling and then get the necessary things
- Design the lighting setup
Once the actual image idea has been found, you’ll start thinking about the lighting setup and what kind of mood you want to convey with that light. Researching the internet will most likely lead to quite a few shots that might fit the lighting mood you have in mind regarding your own idea. Now the time has come where you should take a closer look at the image in order to draw conclusions on the initial lighting setup.
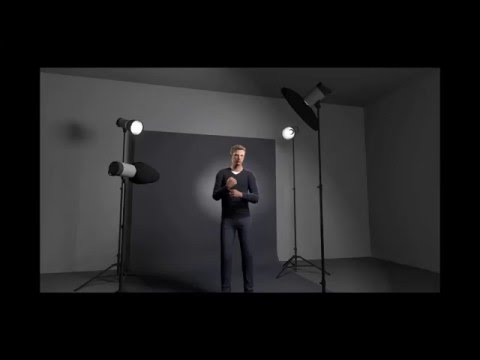
- Mit Klick auf das Video, wird eine Verbindung zu Youtube aufgebaut, es gelten damit die Datenschutzbestimmungen von Youtube. -
By means of set.a.light 3D you can approach the lighting set in a very smart way until it perfectly fits your own planned shoot.
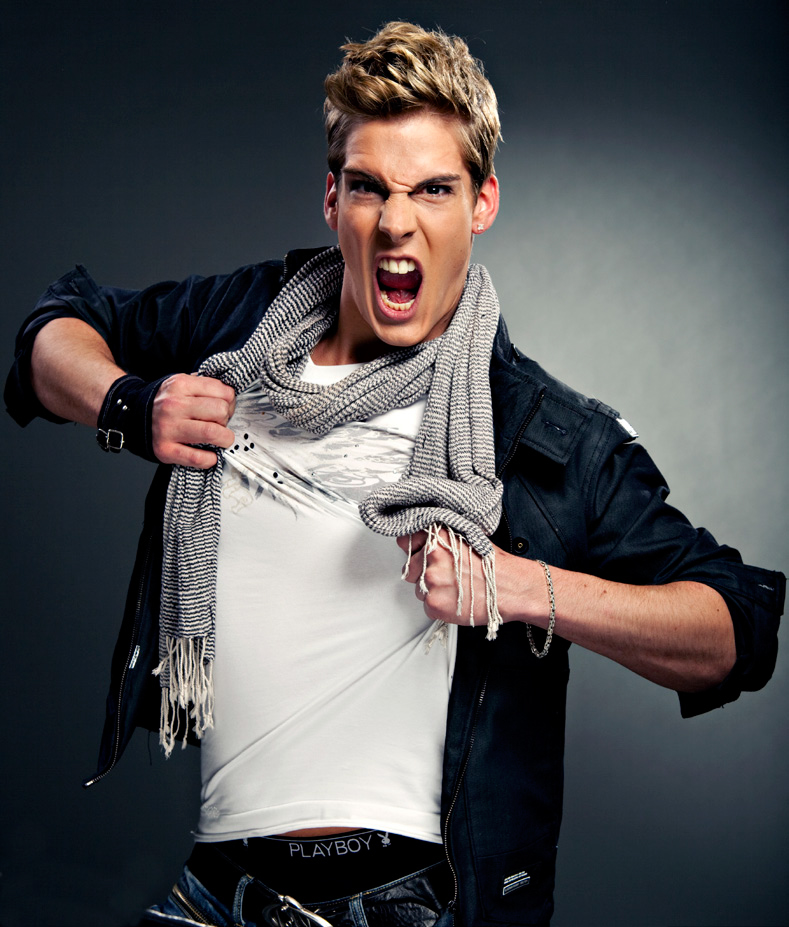
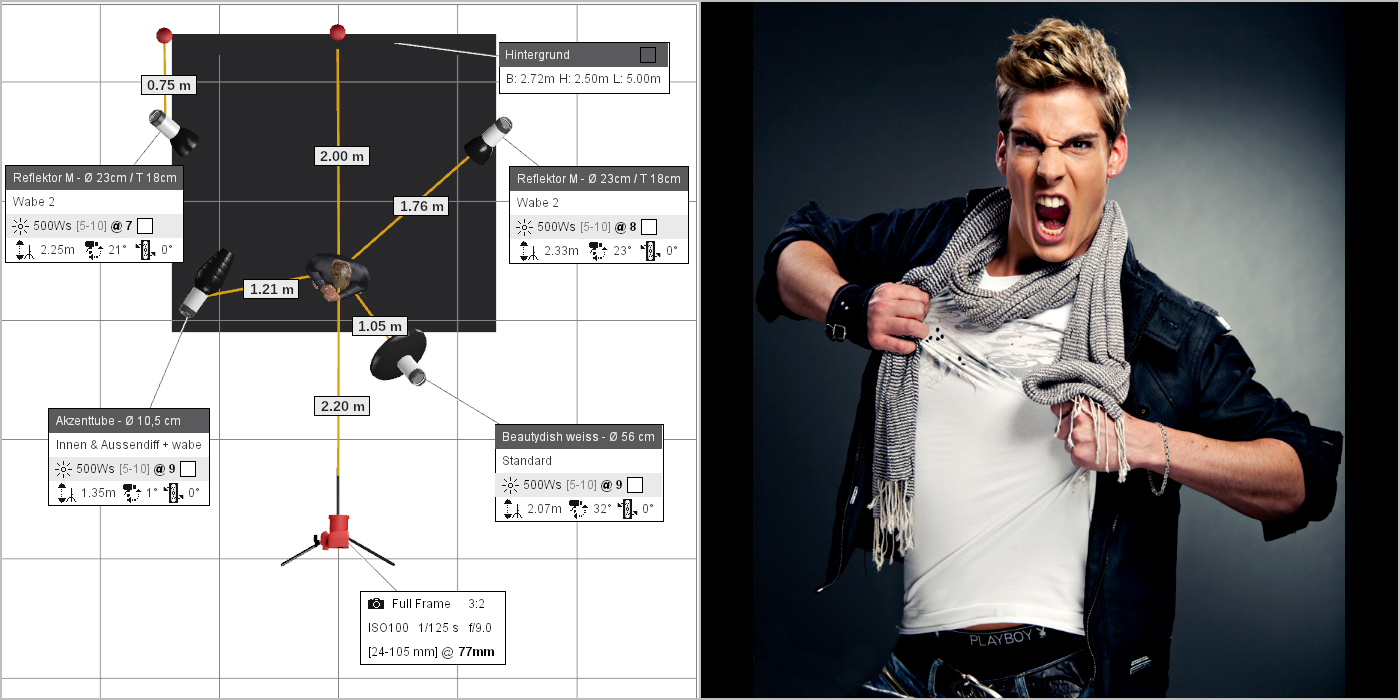
Model: Norman Langen – Photographer: Johannes Dauner
So if we like to recreate (the lighting set of) the image above, we have to think about the lighting composition.
In set.a.light 3D you could now start with setting the background first, placing the model and creating the lighting effect on the background. Taking a closer look at the background, you see a very fast light fall-off towards the edges. This scenario implies a pretty hard light former. Now there are of course many possible ways how to produce this effect. So it’s best to simply choose a suitable light former from your own repertoire.
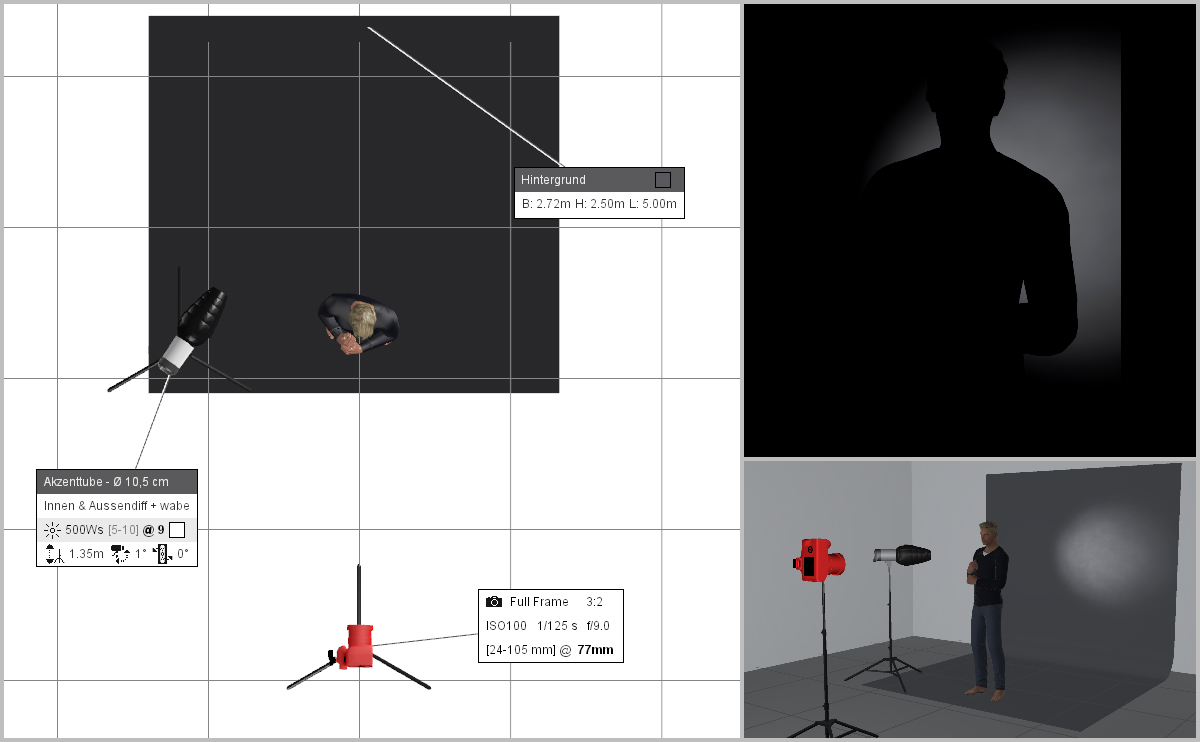
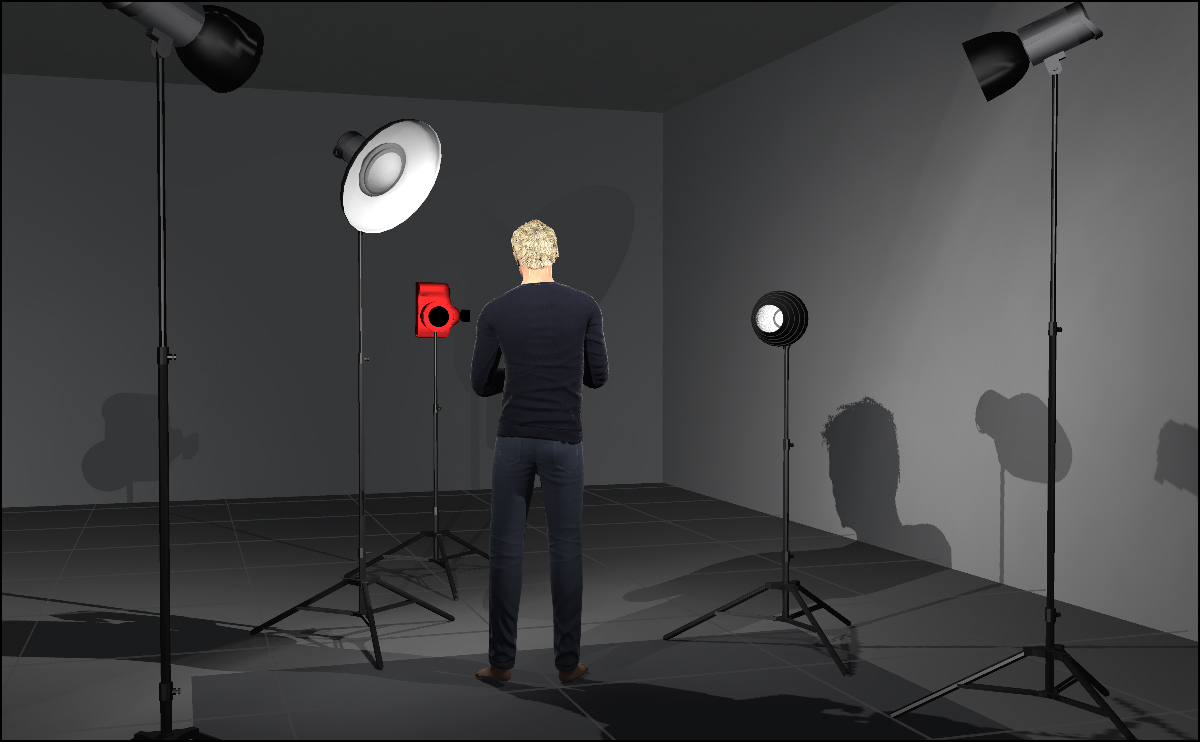
As you can see here, we have selected a narrow-angle tube and placed it in a somewhat unusual way next to the model. However, it already matches the lighting effect of our target image quite well. The right distance to the background (and the model as well) can be detected by “trial and error”. :-)
Now let’s take a look at the model’s face or rather the light effects on his hair. Here we notice that a quite hard light former must have been used in each case, probably a reflector including a grid. Another even more careful view at the displayed effects on the hair shows us strong light/dark gradation and crisp highlights. Such an effect can hardly be achieved with a striplight, for example. Therefore, we decided to choose a reflector in this case. Now if you take yet another look at the jacket, especially around the hip area, you hardly see a contouring that a striplight would create. This also implies a quick light fall-off. Therefore, our approach with a grid (that provides for a quick light fall-off) should be a great match.
On the left side, the effects are not quite clearly detectable because the light is less intense and darker. However, we also see high contrasts in the areas of hair and ear and a quick light fall-off on the jacket. Therefore, a reflector with attached grid surely is the right equipment to proceed with.
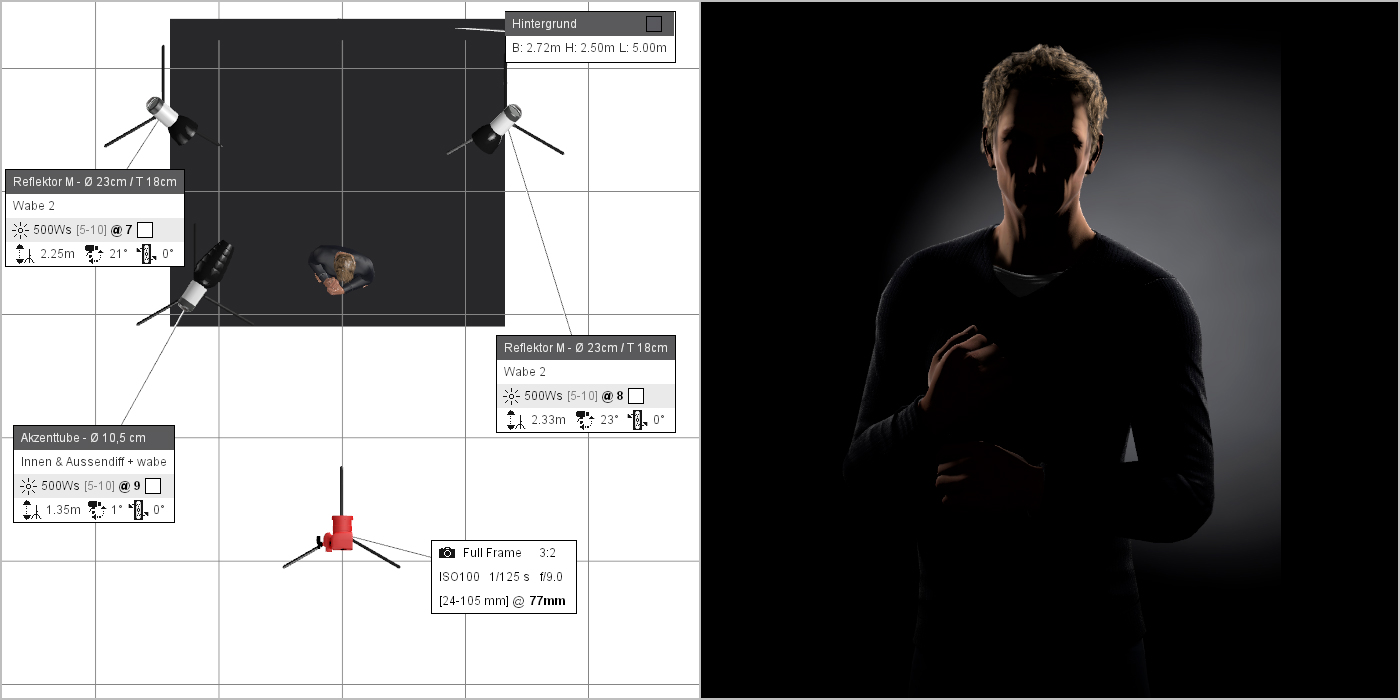
Portrait contouring light (reflector + honeycomb) and background light (tube)
Now we are “only” missing out on the main light to complete this portrait.
In order to draw conclusions on the main light, it’s worth taking a look at the eyes first. Often times it is possible to detect the light former by means of the reflection in the eyes. But beware: almost ALL images that you find on the web or in magazines have been heavily edited. So in some cases this of course makes it harder to find out which kind of light had been applied. It is not uncommon that the reflections in the eyes are being altered as well in order to adjust them to fit the image style. Of course the same goes for the complete picture! Contrasts are usually increased and adjustments applied to colors etc. This makes it harder to recreate the lighting set in a precise manner because you definitely CAN’T FIND THE EXACT result!
It is simply impossible to implement an edited image quasi “out of the box” in a studio. So you have to try to imagine the editing away. Special attention should be paid to the dynamic of the picture! In the studio, it is almost impossible to achieve the same high dynamic as seen in an edited image. The same applies to a lighting set created in set.a.light 3D. Since this is a real studio simulation, it is often times not possible to achieve the same high dynamic and contrasts.
Back to the image: So let’s take a closer look at the eyes, the reflections and the shadow in the nose and chin area. Especially by means of the nose and chin shadow, the “hardness” of the light former as well as its position (height) can be read quite well. The reflection in the eyes does not tell us too much in this case because it’s rather small and unclear. Since the reflection is quite small, the light former used should be of a not too big nature as well (alternately, it could also have been place farther away). Shadows around mouth and nose point to some sort of hardness but also to some softer elements. So it could not have been a reflector because many shadows would have to appear much harder. A smaller softbox is also out of the question because it may be expected to lack hardness and it can be assumed that the reflection in the eyes would have turned out slightly softer. So what’s left? -> Correct, a Beauty Dish :)
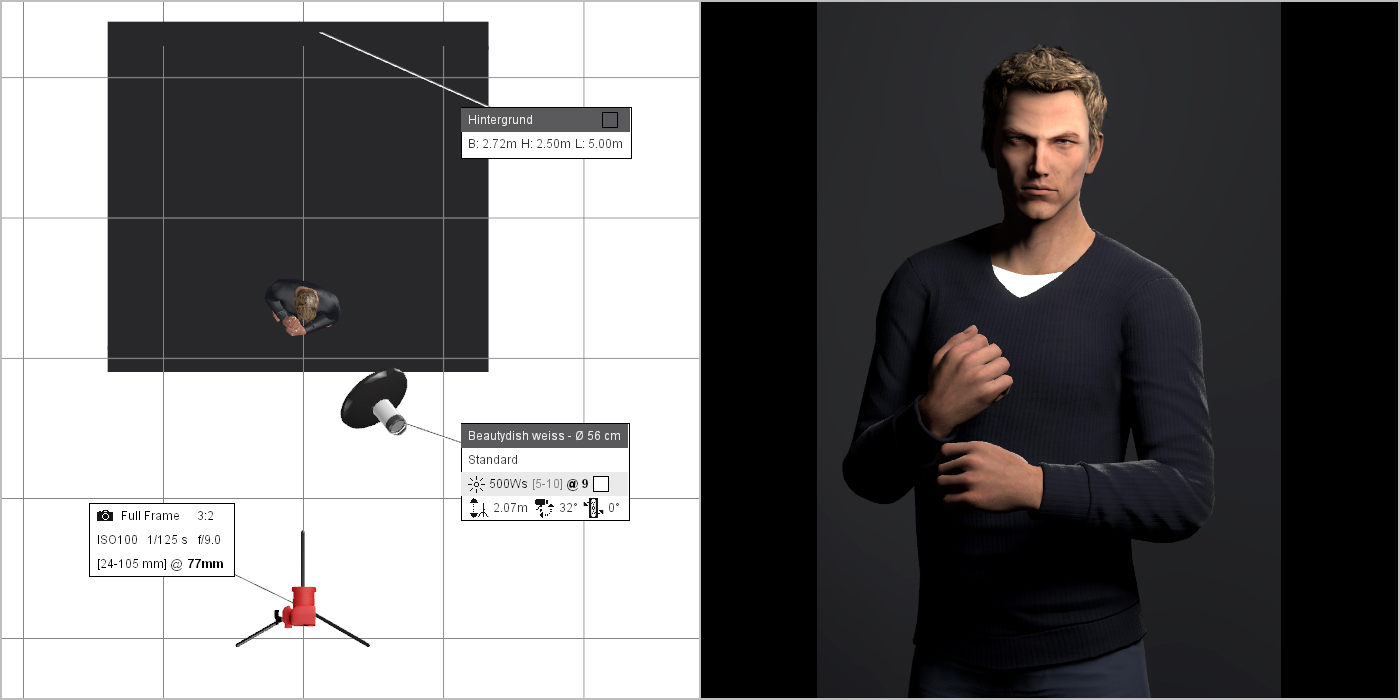
Portrait with a beauty dish as the main light
On the above set the suitable shadows around mouth, chin and nose can be seen very well. The hardness now also matches the actual target lighting set in an excellent way.
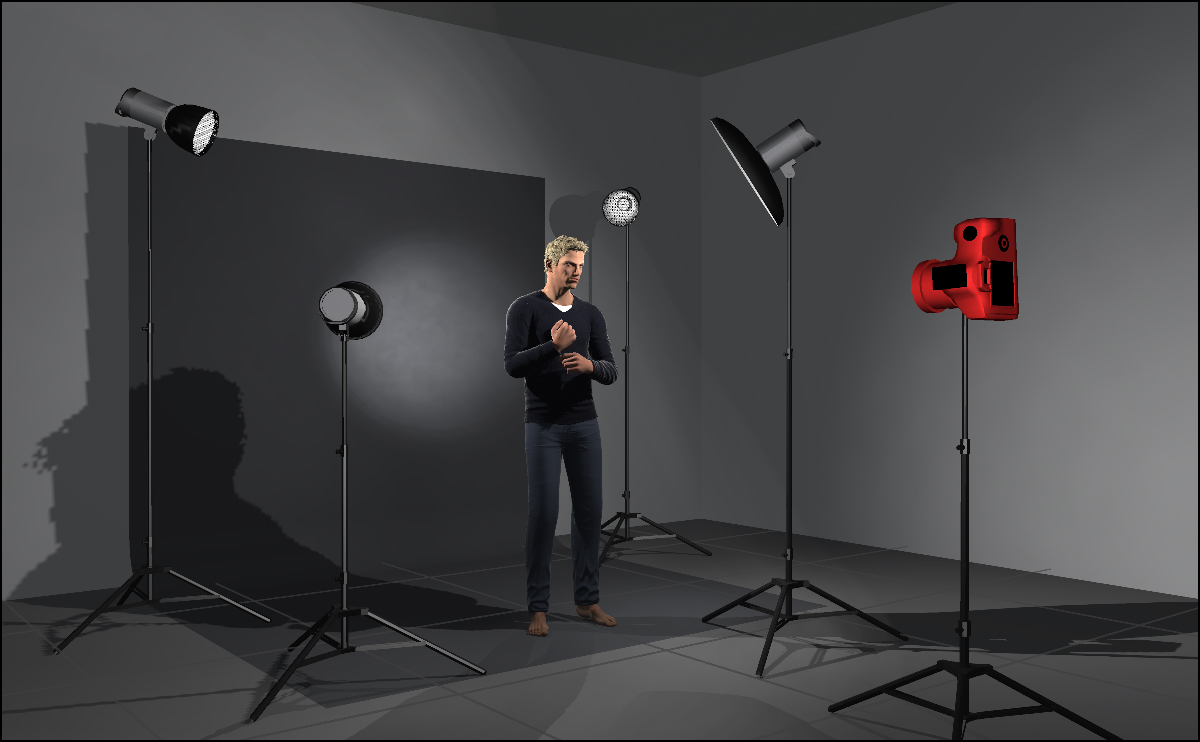
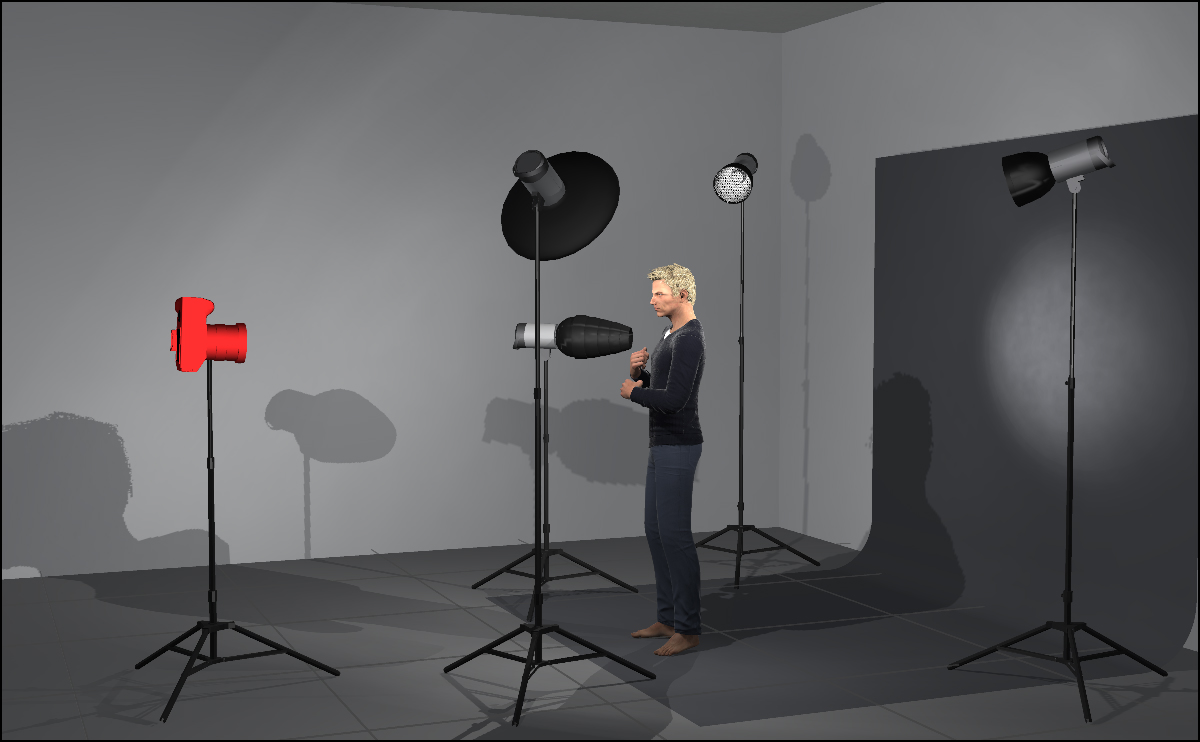
So now it’s time to turn on all lights at once in order to observe the result.
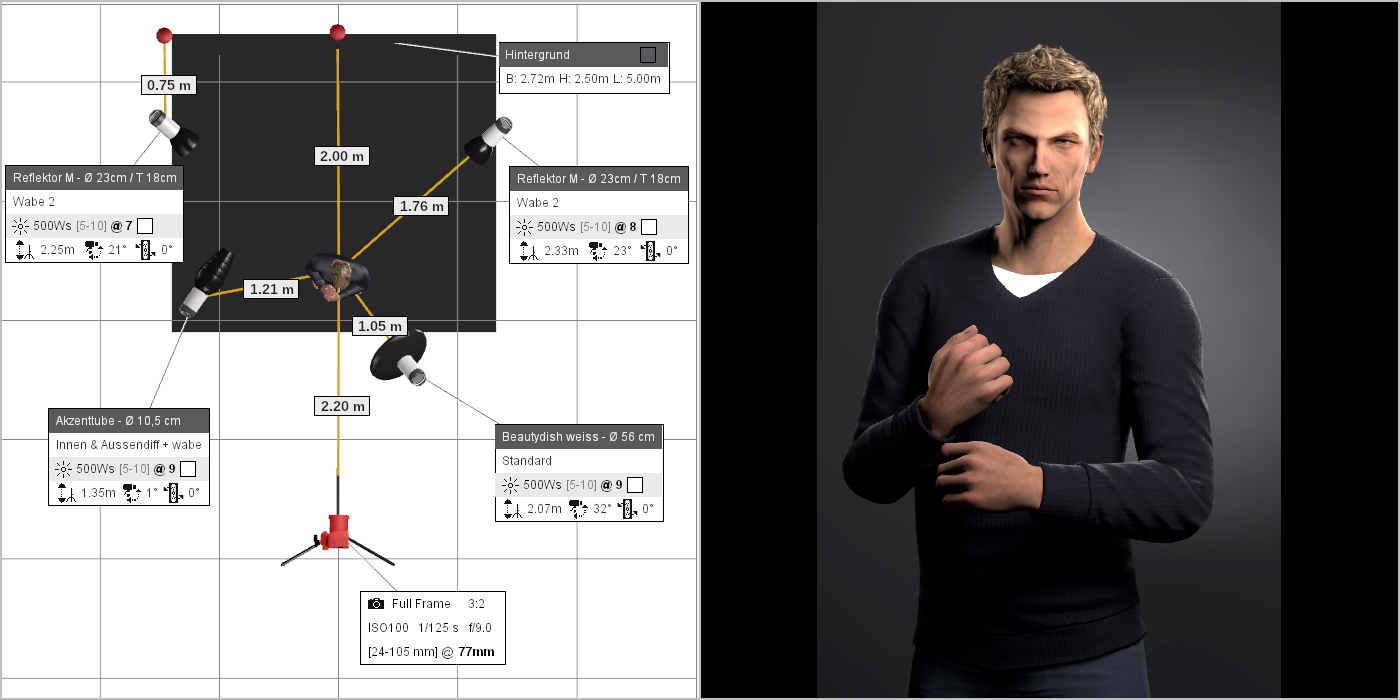
Result Light Setup: Portrait with Beautydish, reflectors and narrow beam tube
The result shows that we’ve come very close to the real image. As previously mentioned, the dynamic, contrasts, colors etc. as produced by the camera can never match the finished (edited) image. But that doesn’t matter since you’re going to edit your picture after the shoot as well. :)
The lighting set that we were able to figure out this way will now help us to quickly find our desired lighting later on in the studio. So there are only a few corrections and adjustments to be made according to the real circumstances in the studio but ultimately there will be more time left to shoot cool pictures with your model.
Every preparation for a shoot always requires (as an important focal point) the matching lighting setup! By using set.a.light 3D to figure the setup out before the shoot, you can be relaxed and rest assured that you’ll very quickly find the desired result in studio later on. This is the professional way of working on a top-notch level!
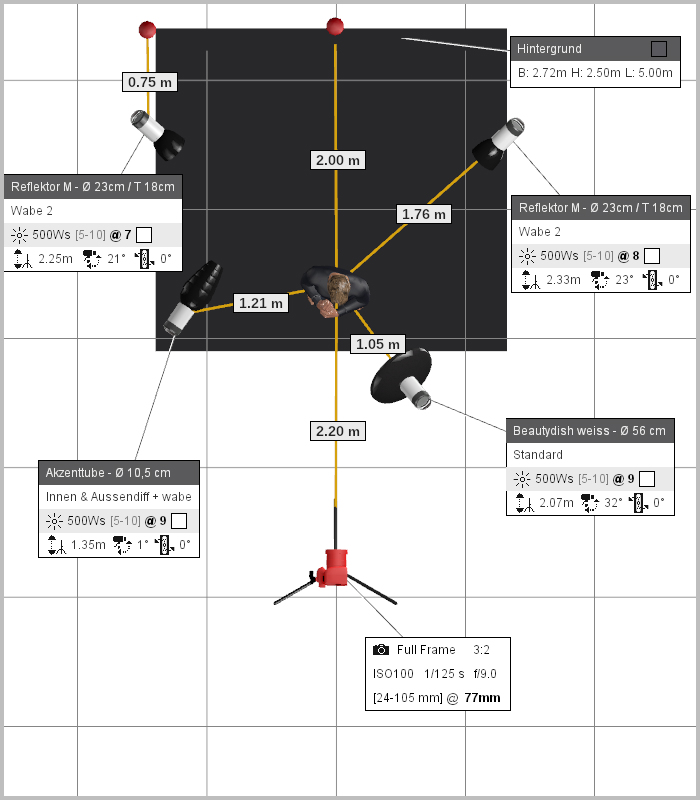
Final studio setup (lighting diagram) for a dynamic portrait lighting setup with Beauty Dish
By the way, in set.a.light 3D STUDIO you can replace the rendered image with your own picture. This especially makes sense when you have a real shot in relation to the lighting setup. This way it will be even easier to achieve the desired shot in the studio. Besides, you will have everything combined on only one graphic that can easily be shared with other photographers as needed.
By the way: Since you are composing and testing your lighting setups in set.a.light 3D, you automatically create a huge repertoire of lighting sets that you can quickly access at any time.
Paver lighting setup for portrait with own image and light setup
And in order for you to follow along the above described process hands-on and actually see how easy it is to produce such incredible results, we encourage you to download this free version of set.a.light 3D and start testing it right away.
Download: [Download not found]
set.a.light 3D STUDIO you can download right HERE.
Have fun trying :)
Your Johannes Dauner
Ps: how to use the “Lighting Diagram Export” you will learn HERE.
This post is also available in: German