 elixxier – Photo Blog Light settings and lighting structures for studio and outdoor photography. Tips and tricks for set.a.light 3D – The photo studio and light simulation for photographers.
set.a.light 3D is a powerful environment to experiment with various lighting setups and to prepare for actual shoots. In addition, it is a great tool to demonstrate and teach lighting techniques.
The software’s capabilities however are not limited to the field of lighting: its flexible features and high-quality image rendering make it suitable for broader photographic exploration. In the following use case, I used set.a.light 3D to illustrate the concept, workflow and results of the Brenizer method as part of an article for the Belgian (Dutch language) photo magazine Shoot. This technique combines the broad field of a wide-angle shot with the shallow depth of field of a telephoto shot into a single image, by merging multiple tightly cropped shots of the subject and its surroundings into one wide-view panorama.
The virtual studio environment
To demonstrate the various aspects of the Brenizer process under controlled working conditions, I created a studio scene using set.a.light 3D STUDIO (v2.5.8d). The main subject is a female model, standing at about three meters from the camera. Other objects were added as foreground and background elements, to help visualize the depth of field transitions. A series of continuous light sources provide for an even global illumination.
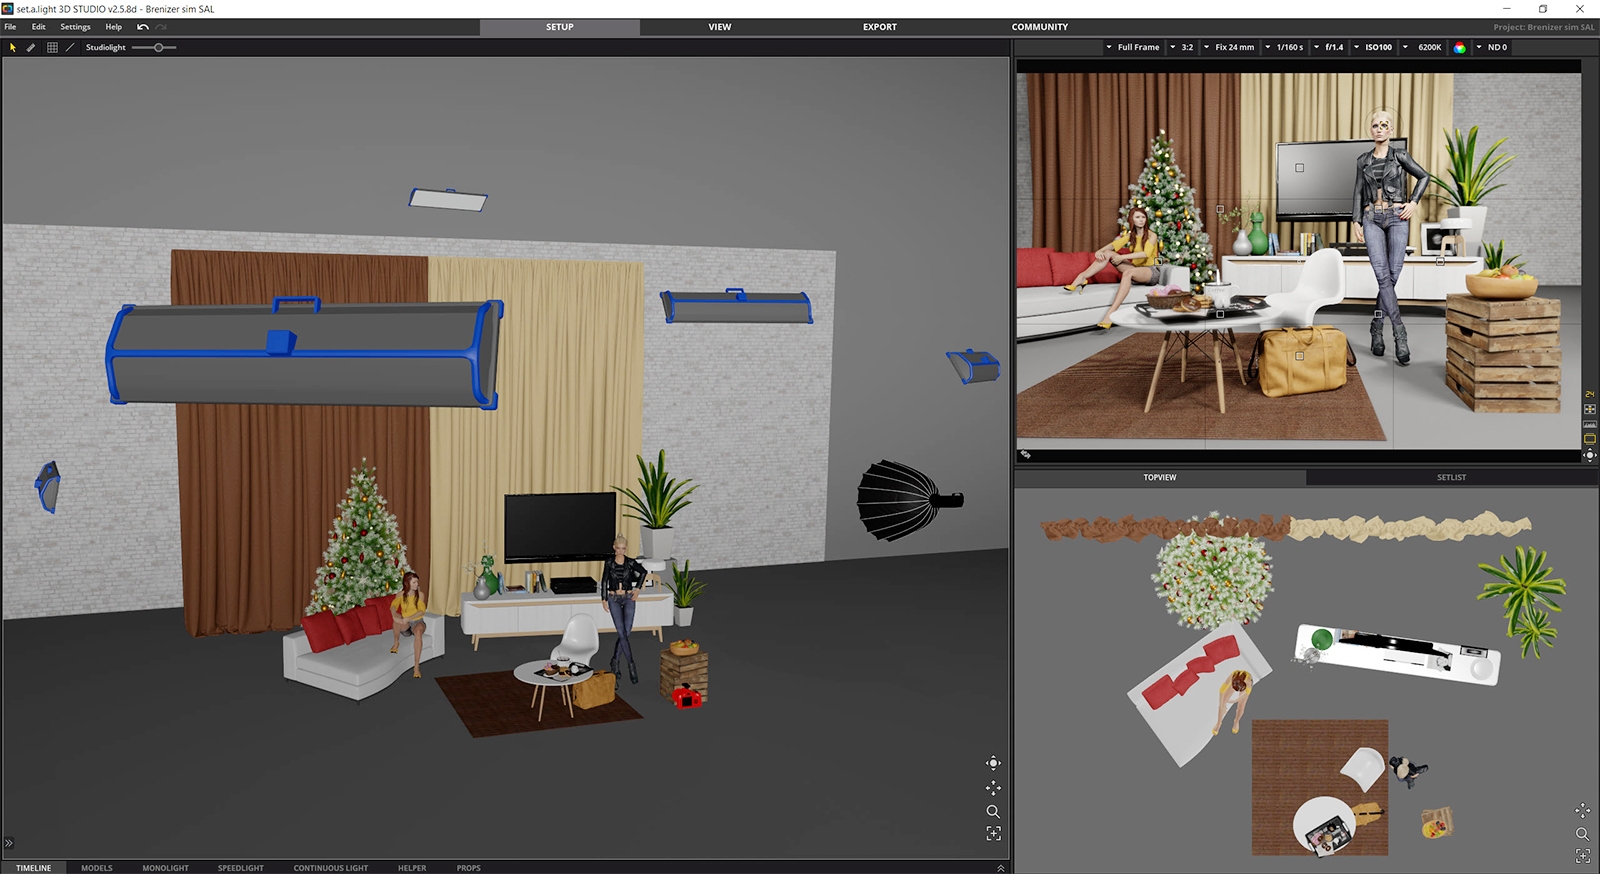
I then ‘snapped’ a reference shot assuming a full-frame camera with a 24mm f/1.4 lens, manually focused on the model’s left eye. This image shows the considerable depth of field obtained with a wide-angle lens (even at f/1.4), as well the typical geometric distortion of nearby and corner objects.

Building the Brenizer panorama
Next, I changed the lens selection to 85mm f/1.4, again focused manually on the model’s left eye, and continued ‘shooting’ from the same position with identical exposure settings. I snapped three rows of nine partial photos each, carefully panning left to right and up to down by adjusting the pitch and yaw settings in constant size steps. These images overlap by about 40% in each direction.
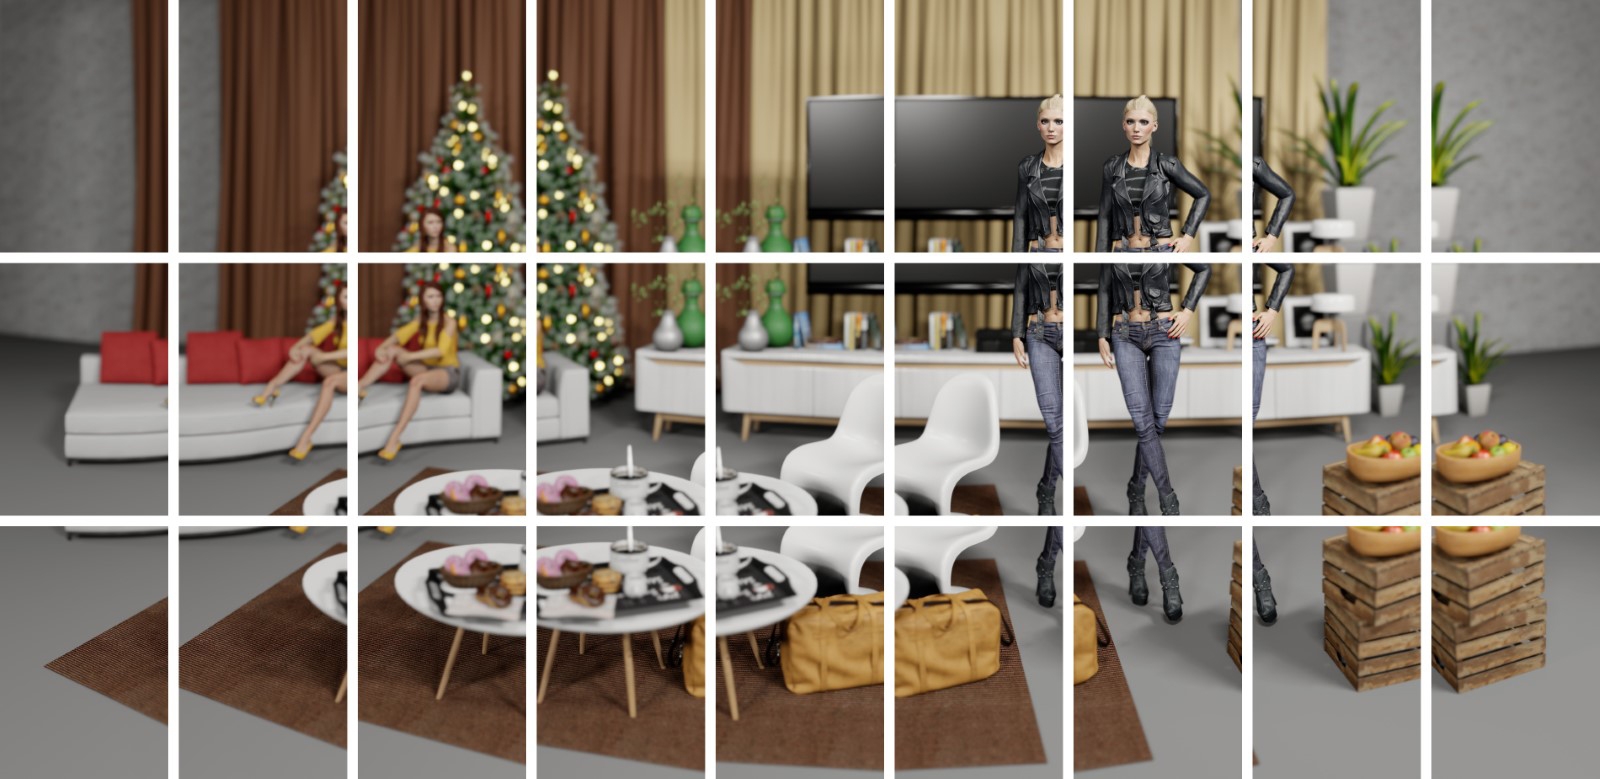
I used the highest quality rendering setting to export the single reference picture and the twenty-seven partial images. In the next and final step, I used Adobe Photoshop 2022 to ‘Photomerge’ the twenty-seven partial shots into a single panorama, opting for the spherical projection method. Helped by the uniform spacing of horizontal and vertical movements and the generous 40% image overlap, the stitching process did not produce any visible artifacts.
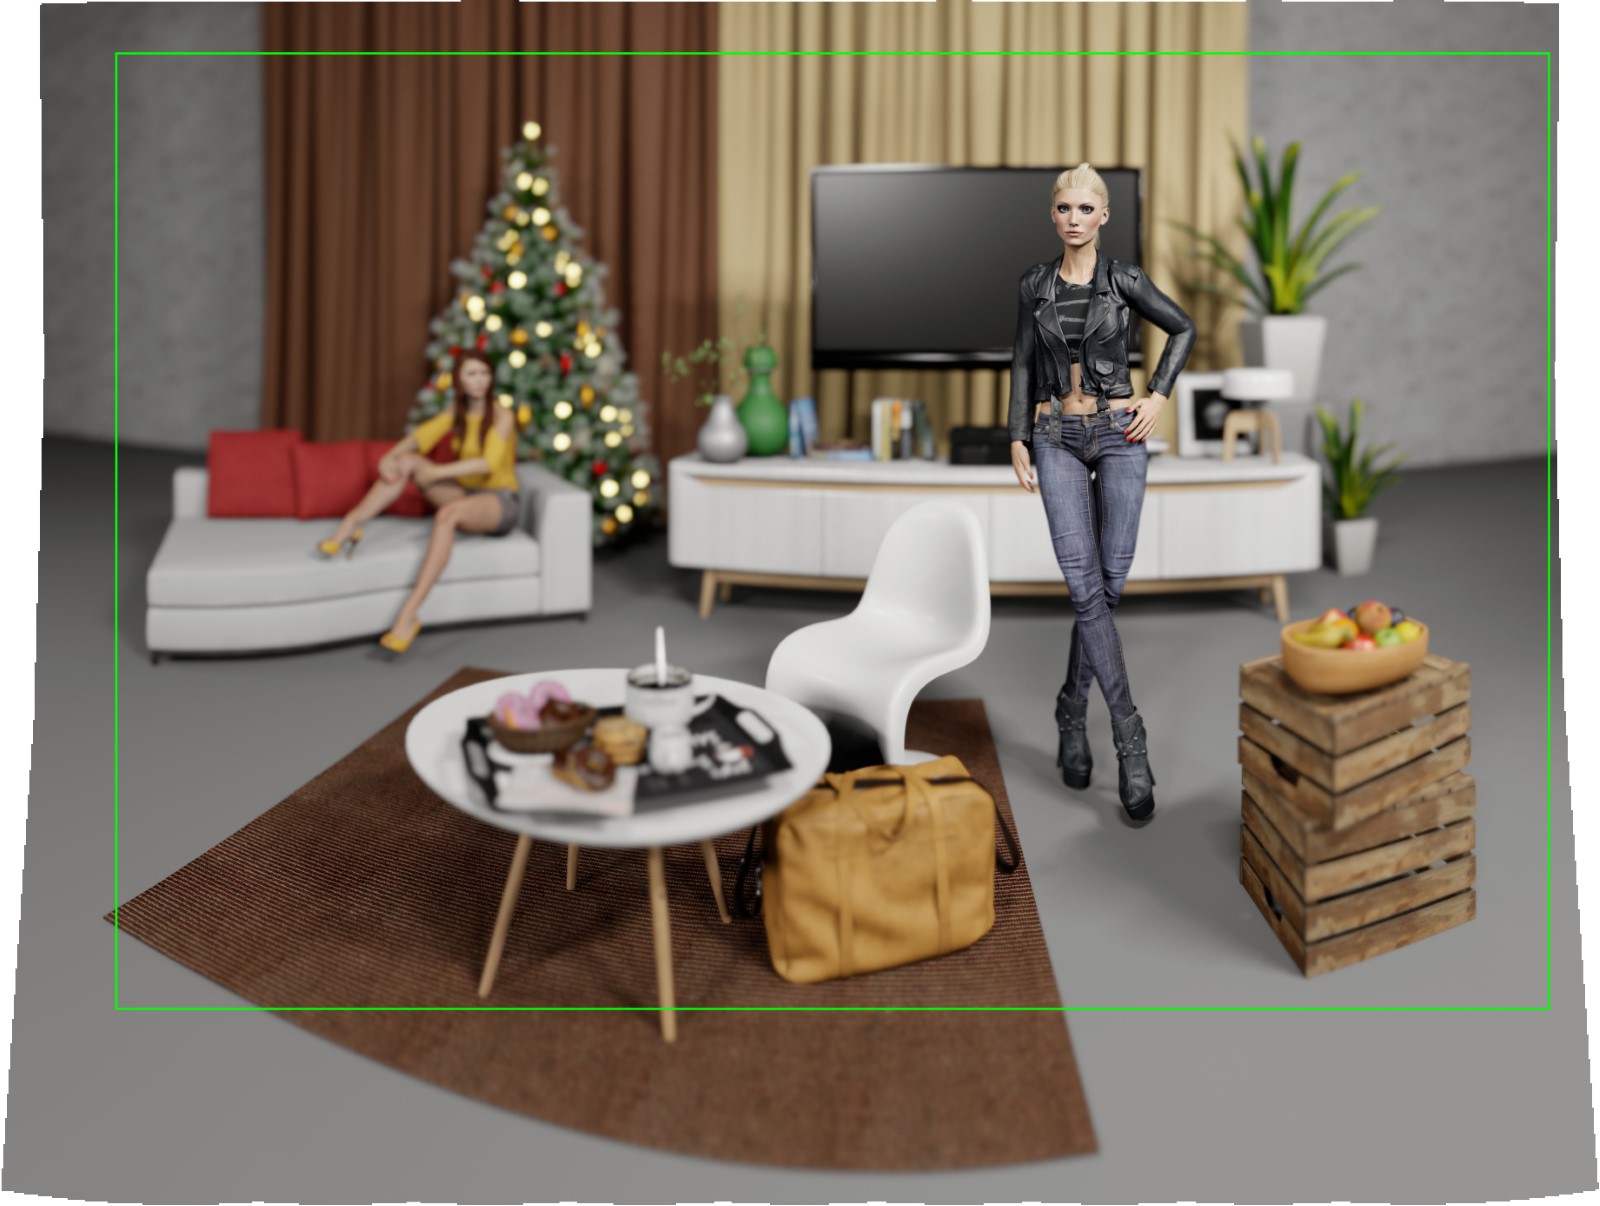
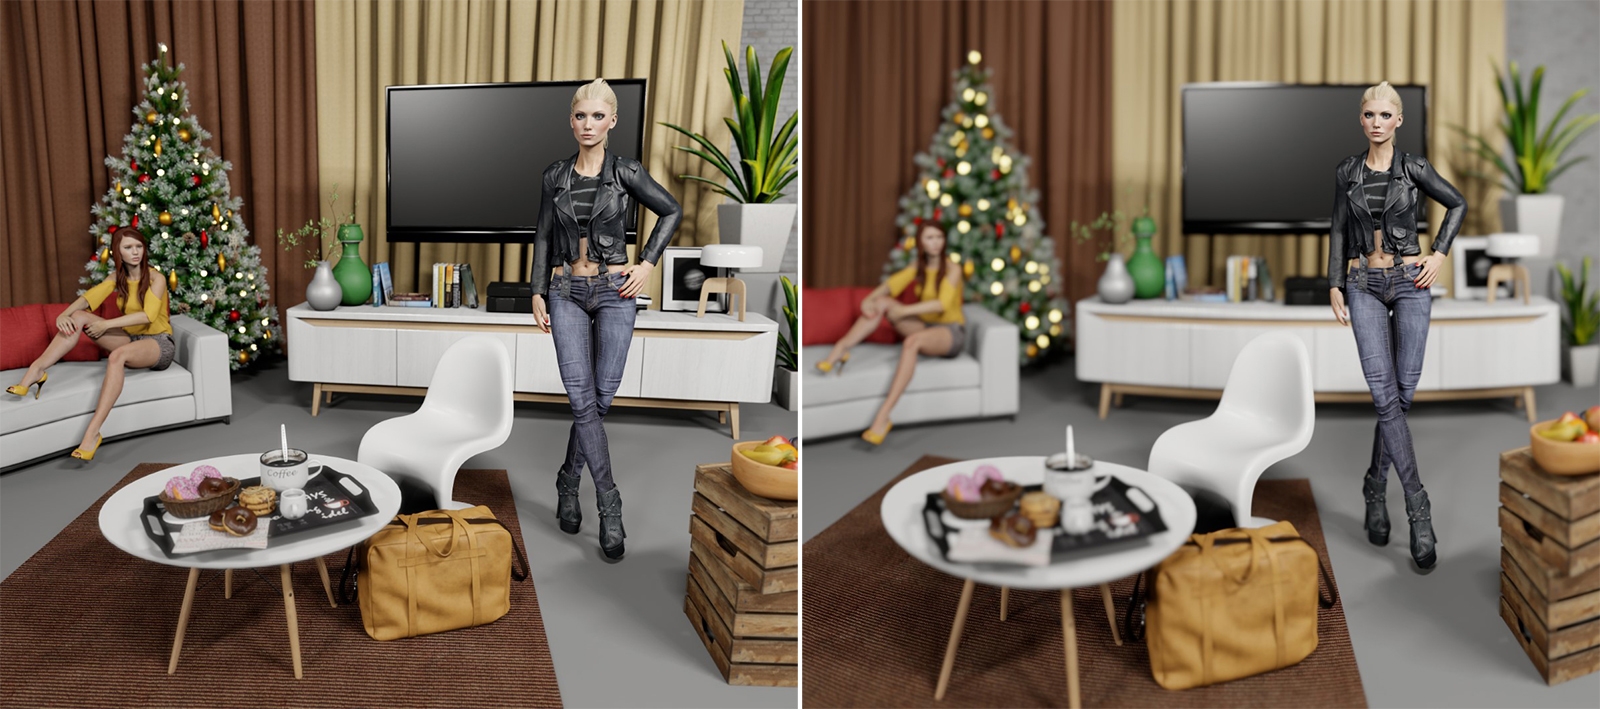
The final Brenizer picture (cropped to a similar coverage as the 24mm reference shot) clearly shows a much shallower depth of field, but also different geometric distortions across the image area. Its field of view and depth of field correspond to the use of a hypothetical 27mm f/0.45 lens!

Why use set.a.light 3D for this?
Exploring the do’s and don’ts of a sophisticated shooting technique is significantly facilitated by working in a repeatable and fully controlled environment. For example, the results obtained with different lens focal lengths (and the associated row and column configurations) are easy to compare. And where else would you find subjects with this level of patience and stamina?
This article was written by René Delbar and provided to us. Thank you very much!
You can find René Dalbar’s website with his wonderful photographs here: https://www.renedelbarphoto.com/