 elixxier – Photo Blog Light settings and lighting structures for studio and outdoor photography. Tips and tricks for set.a.light 3D – The photo studio and light simulation for photographers.

What do you do when you have to produce a stylized shoot on a shoestring budget? Use colors and paper, of course. I was hired by designer Ofek Bergman to shoot her new clothing collection. Well, hired is not really the term here, as it was more of a pro bono for a starving art student. As usual with this kind of production, almost everyone chipped in and donated their time in exchange for portfolio images, a learning experience, and a great day with great creatives.
With a very limited budget for art, we decided on a pop theme with strong colors and shapes. This would bring the costs down while creating coherency that ties Ofek’s collection together.
I used set.a.light 3D to create the sets before the shoot and get the team on the same page. It is a great piece of software for storyboarding a frame. You know that I love the lighting aspect of it, but it also allows controlling the model right down to the clothing and finger position.
BUILDING THE SET
Operating on a low budget means that we had to build things from scratch rather than buy props. We wanted basic shapes on strong colors, so we had to get both shapes and colors.
A nearby print house made some laser cut shapes from foam boards. And we ended up with a thick white foam board pile of a triangle, a circle, and a rectangle. The next step was to paint them with the colors of our choice. Between the cans of paint and the three foam board shapes, our budget did not exceed $100.

Another can of paint was used to paint the blue backdrop on a piece of plywood. The orange and white sets were just seamless papers from Savage.
LIGHTING
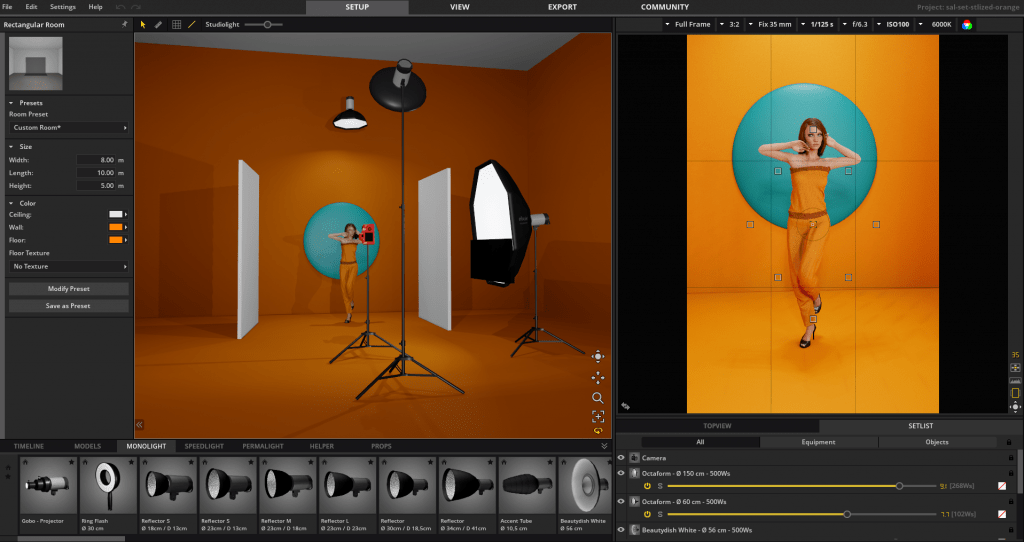
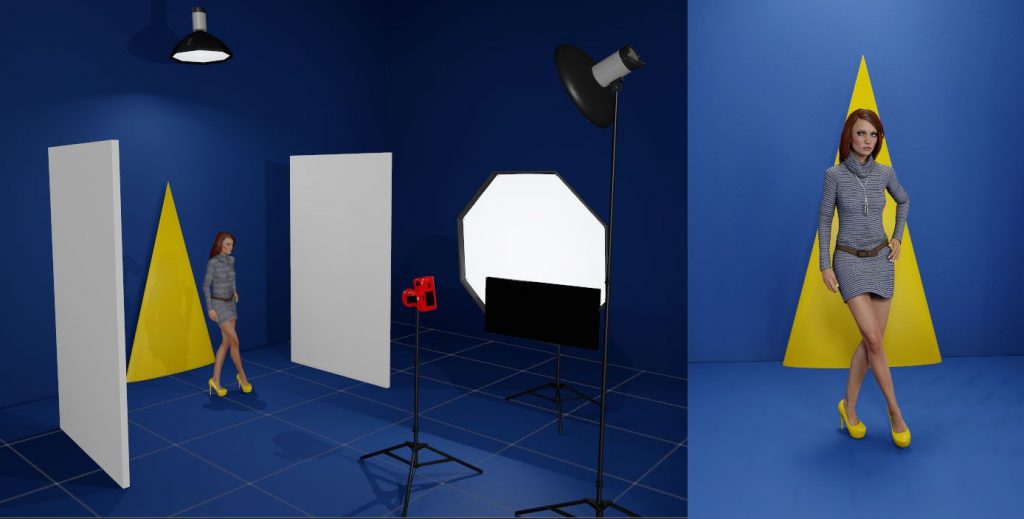
My main light was a Godox AD600 with a big beauty dish for a poppy light. I had to balance the shadows with two white reflectors on either side.
Then another pop with a small, diffused, 40cm octaform, and a Godox 360 coming from the top. I wanted to put another 600 here but did not have enough ceiling space.
Lastly, there was a big reversed umbrella with another Godox AD600 for general fill. I flagged the bottom of the octaform to remove light spillage on the floor.
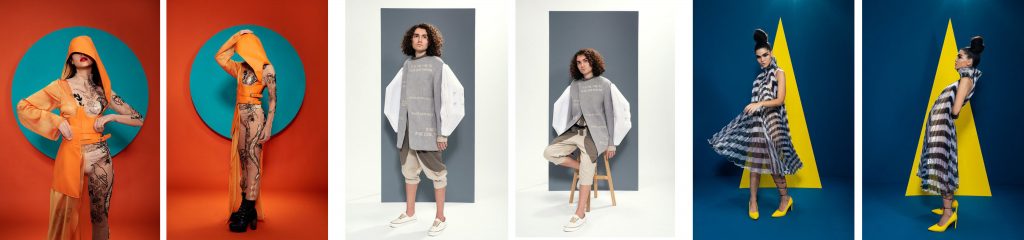
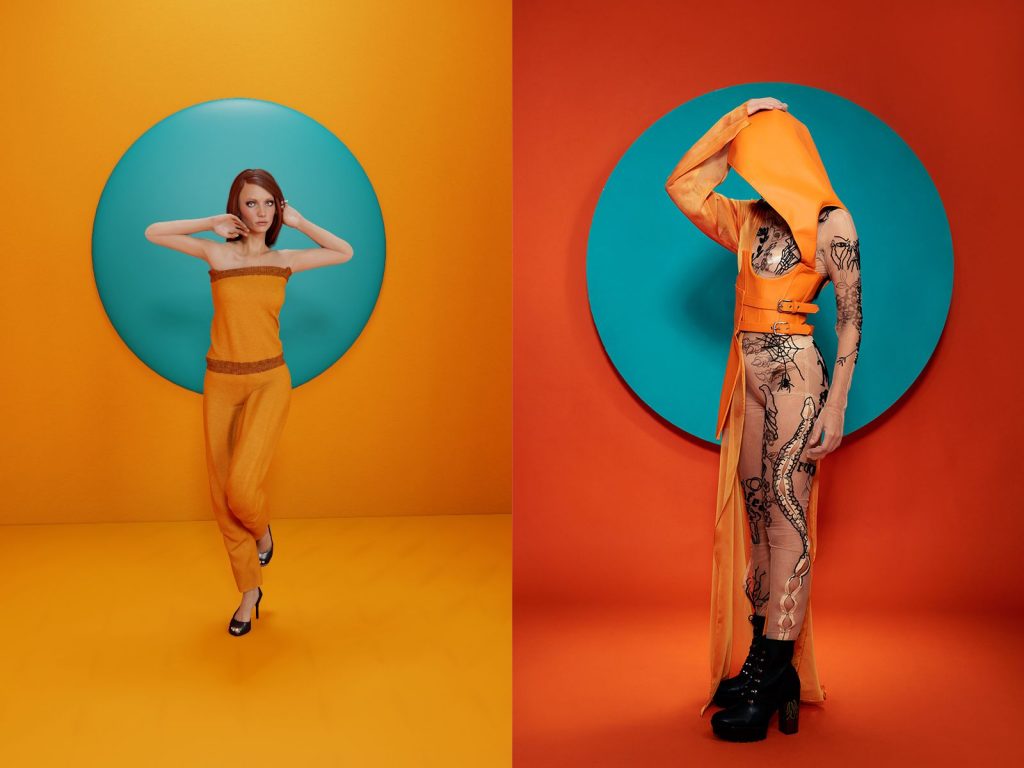
FINAL RESULTS
Here are the three main images from that day:
SET.A.LIGHT.3D FILES
As promised, here are the three set.a.light files: Orange, Yellow, and Gray. You can download the files to play with. (If you don’t have set.a.light 3D, get the demo!). And here is a side by side with one of the sets. I am putting it here to show how useful this process has been for communication with the team, as you can see by the end result.
This article was also published on “DIY PHOTOGRAPHY” and shared with permission. Click HERE to read the original full article. We published is a shortened version of the original article.
DIY Photography is a place for photographers to hang out, chat about gear and to get updated by news and inspirations. DIY features some of the best and most inspiring photography found worldwide, exciting behind the scenes footage and the best photography tutorials to be found on the web.
LEARN MORE ABOUT THE AUTHOR TOM SAIMON
Website: http://www.tomsaimon.com/
Facebook: https://www.facebook.com/saimon99
Instagram: https://www.instagram.com/tom_saimon/
This post is also available in: German