 elixxier – Photo Blog Light settings and lighting structures for studio and outdoor photography. Tips and tricks for set.a.light 3D – The photo studio and light simulation for photographers.
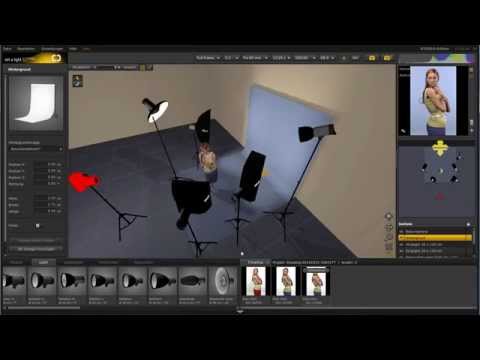
In this video, we show you how you can backtrack and re-establish an original lighting setup on basis of a finished image:
- Mit Klick auf das Video, wird eine Verbindung zu Youtube aufgebaut, es gelten damit die Datenschutzbestimmungen von Youtube. -
The first step is to adjust the room inside of the software to the later studio – this is important because set.a.light 3D also takes back reflections into account. Now you choose a model that most resembles the one in the photo. The model’s hair color can be changed, meaning you don’t need to pay attention to it when making your selection. Once you have your model, you choose the pose that seems to be most suitable. The model can also be mirrored which provides you with more flexibility. Now quickly adjust the colors of the clothing and we are ready to move on to the lighting. But before you do so, you should set the camera properties, ergo the optics, aperture and ISO value..
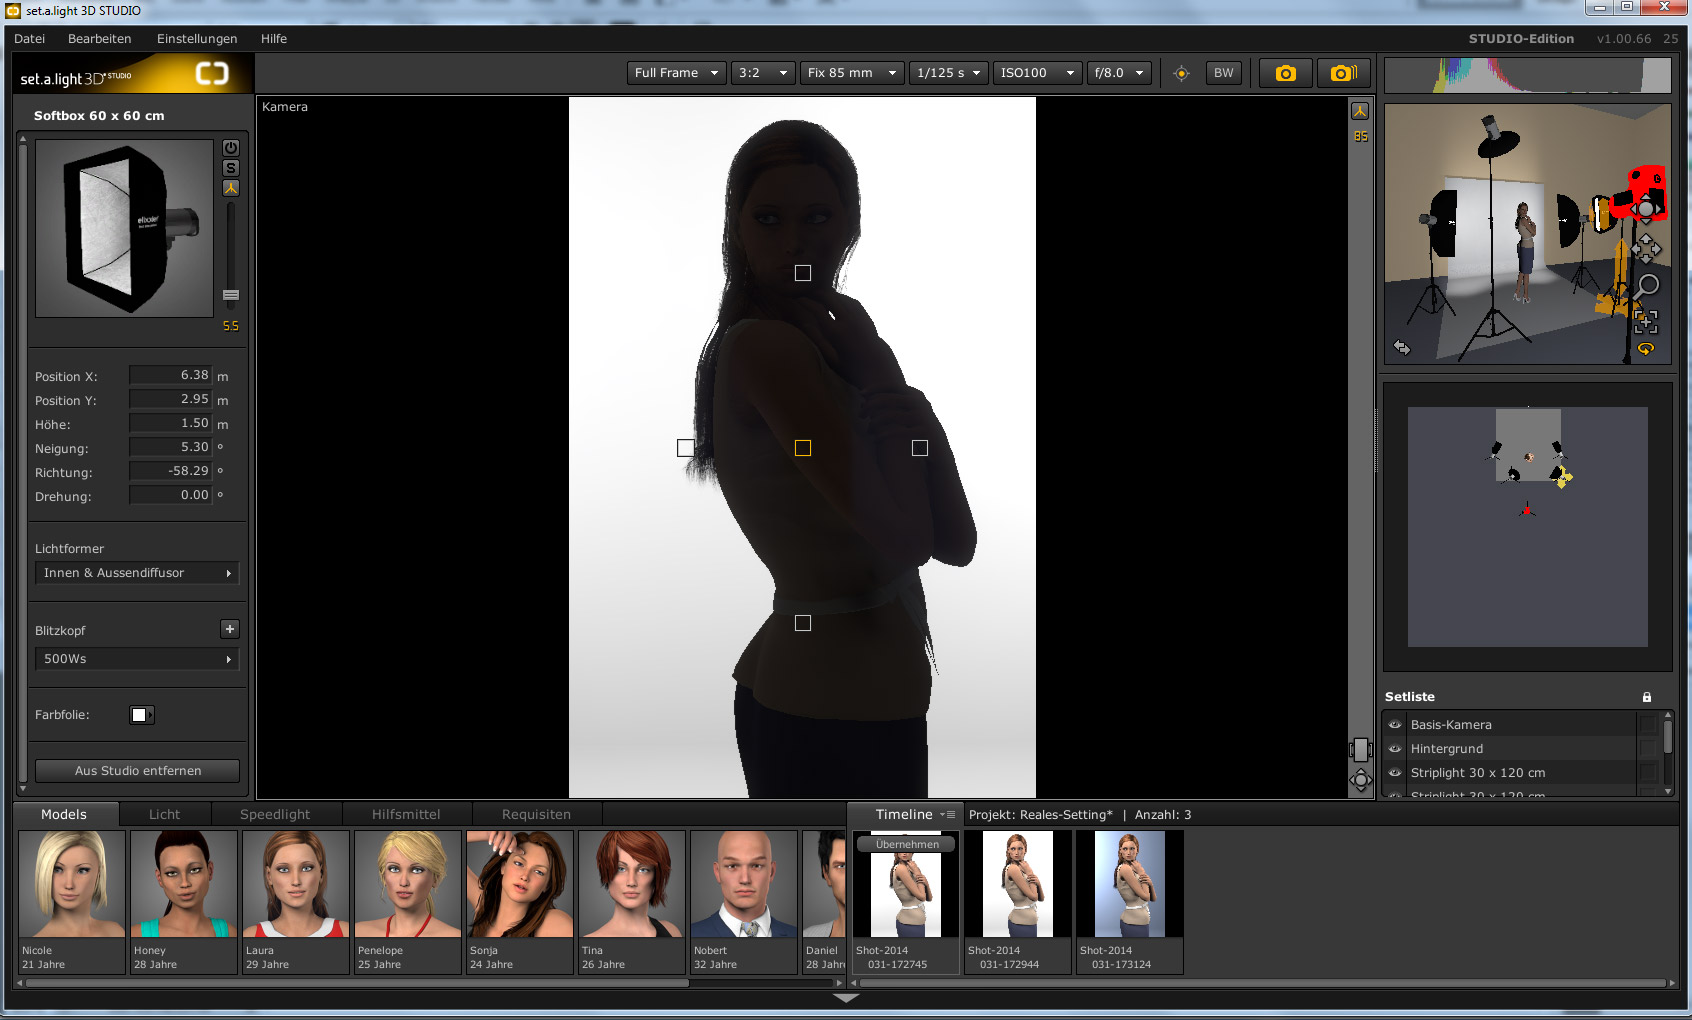
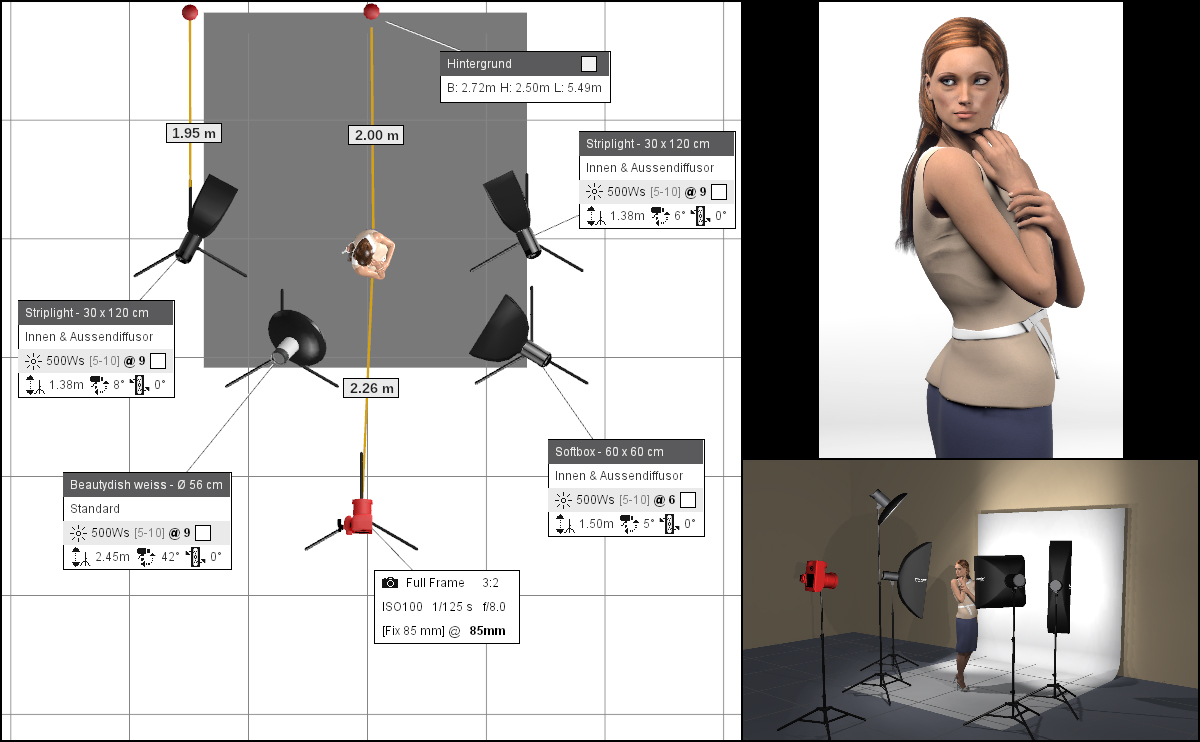
White seamless background lighting – Only two strip lights are on.
In this case, we started out with the white seamless background lighting. We chose 2 strip lights in order to achieve an extremely white background for our shoots. If you don’t have strip lights, you can of course realize this setting with other light formers as well. With set.a.light 3D you can easily test all of this right quick.

Only the Beauty Dish
The main light source features a beauty dish. On the finished image, this could be seen quite well. Based on the fall of shadow of the nose and chin, the corresponding positioning is also pretty easy to detect. All you need to do is to simply move the beauty dish a little bit back and forth and voilà – there it is. Best practice is to switch the beauty dish into solo mode as it allows you to see the lighting effect exceptionally well and therefore leads to a fast adjustment of settings. In this case, we chose a small softbox in order to slightly soften the shadows of the main light. Here you should switch into solo mode yet again so you can see precisely what kind of effect the softbox adds to your overall lighting setup. This way you will also learn to better understand the impact of each single light source.
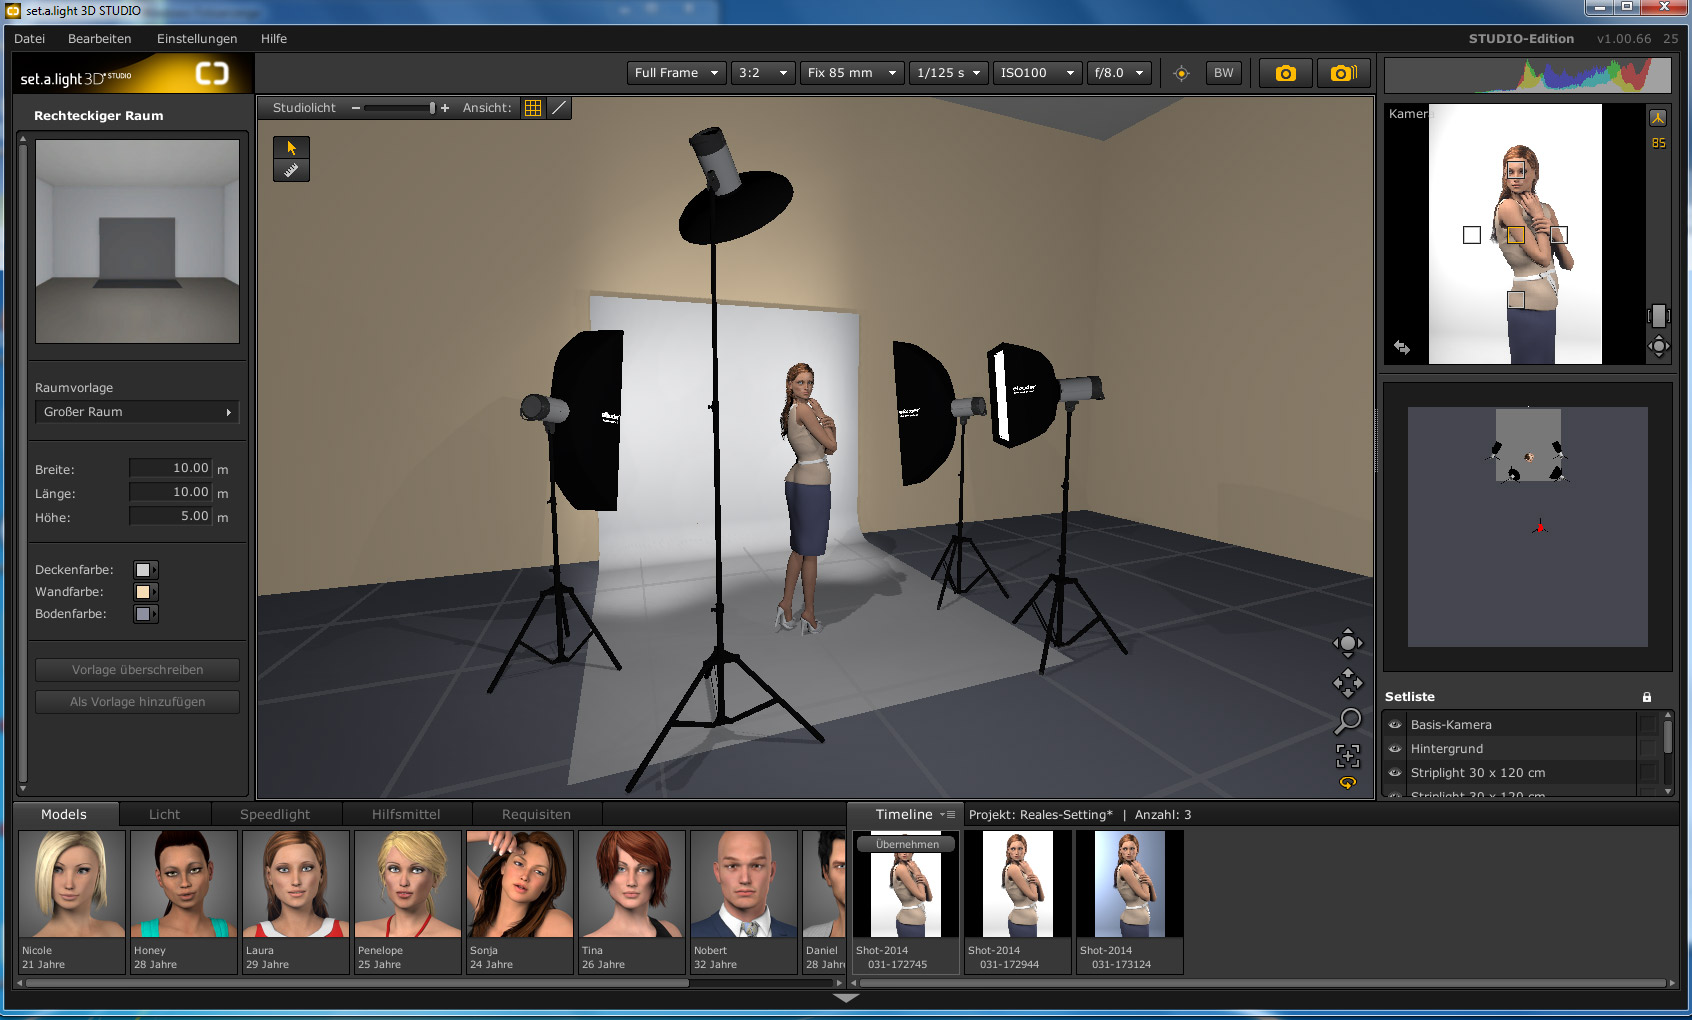
Once rendered, you could actually start to create the PDF set plan inside of the Exporter. If you want to, you can of course experiment with the light design first in order to create quite interesting modifications and expand your repertoire of lighting setups. It is also always quite fascinating to play around with background colors or set additional highlights with reflectors + honeycomb grid.
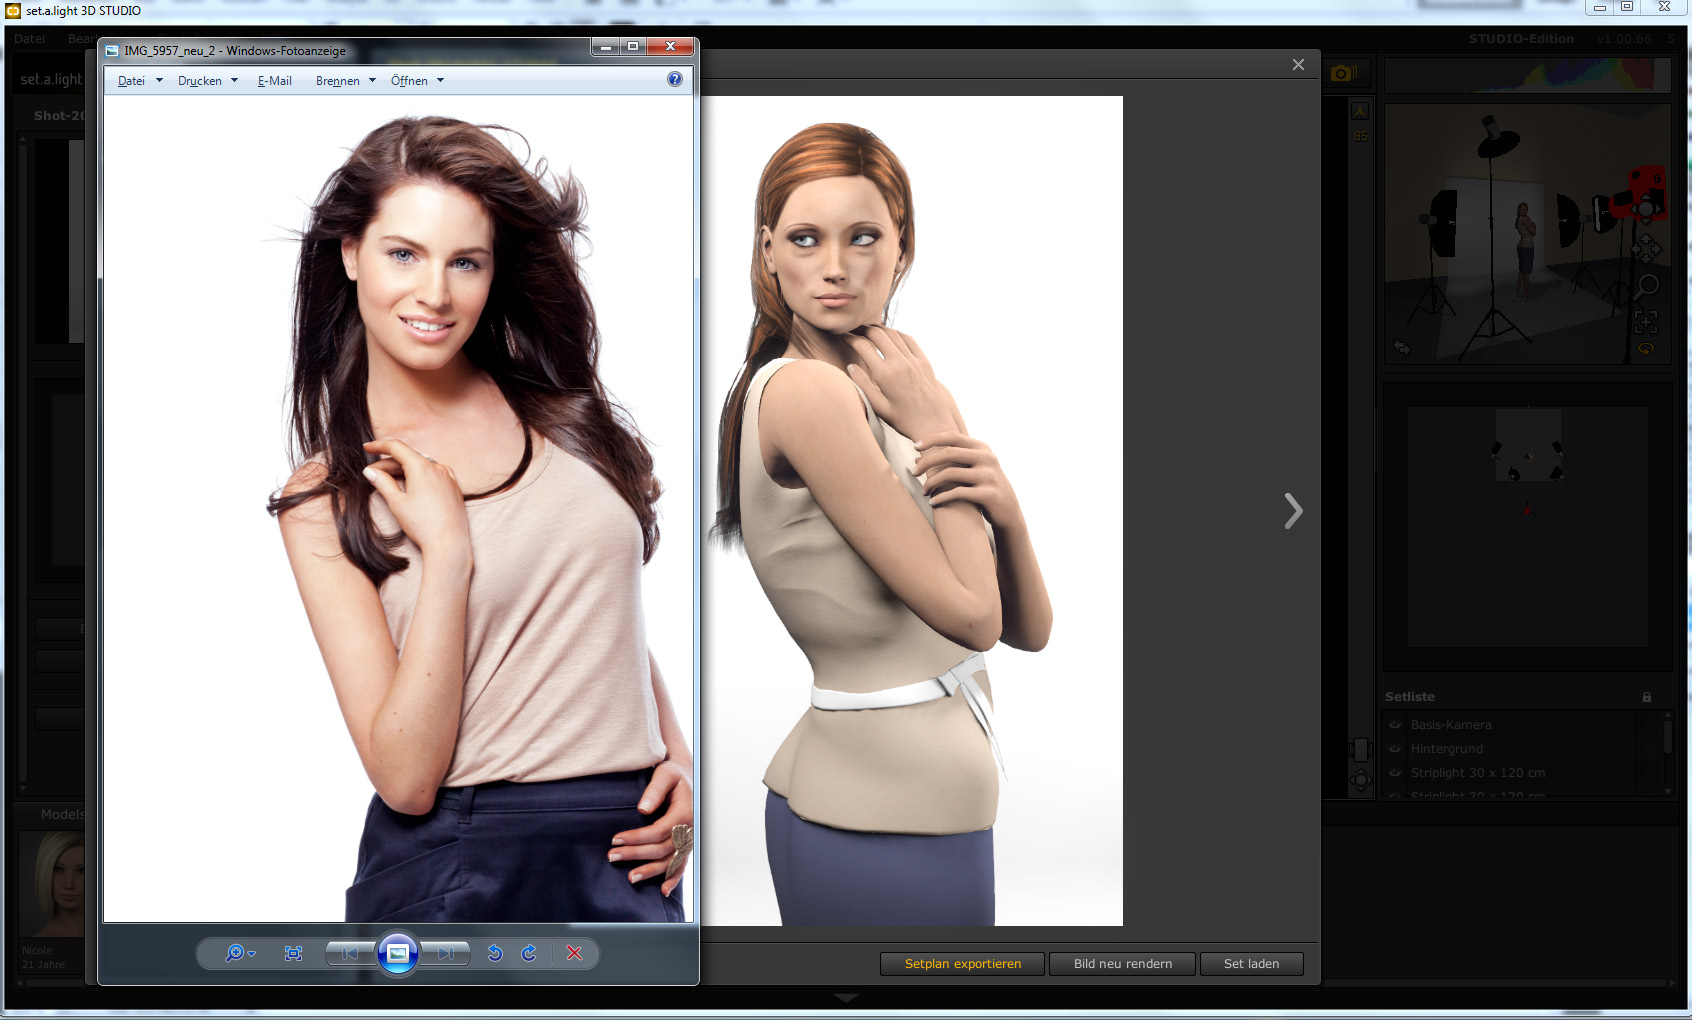
Vergleich zwischen dem fertigem Bild und dem Lichtaufbau aus set.a.light
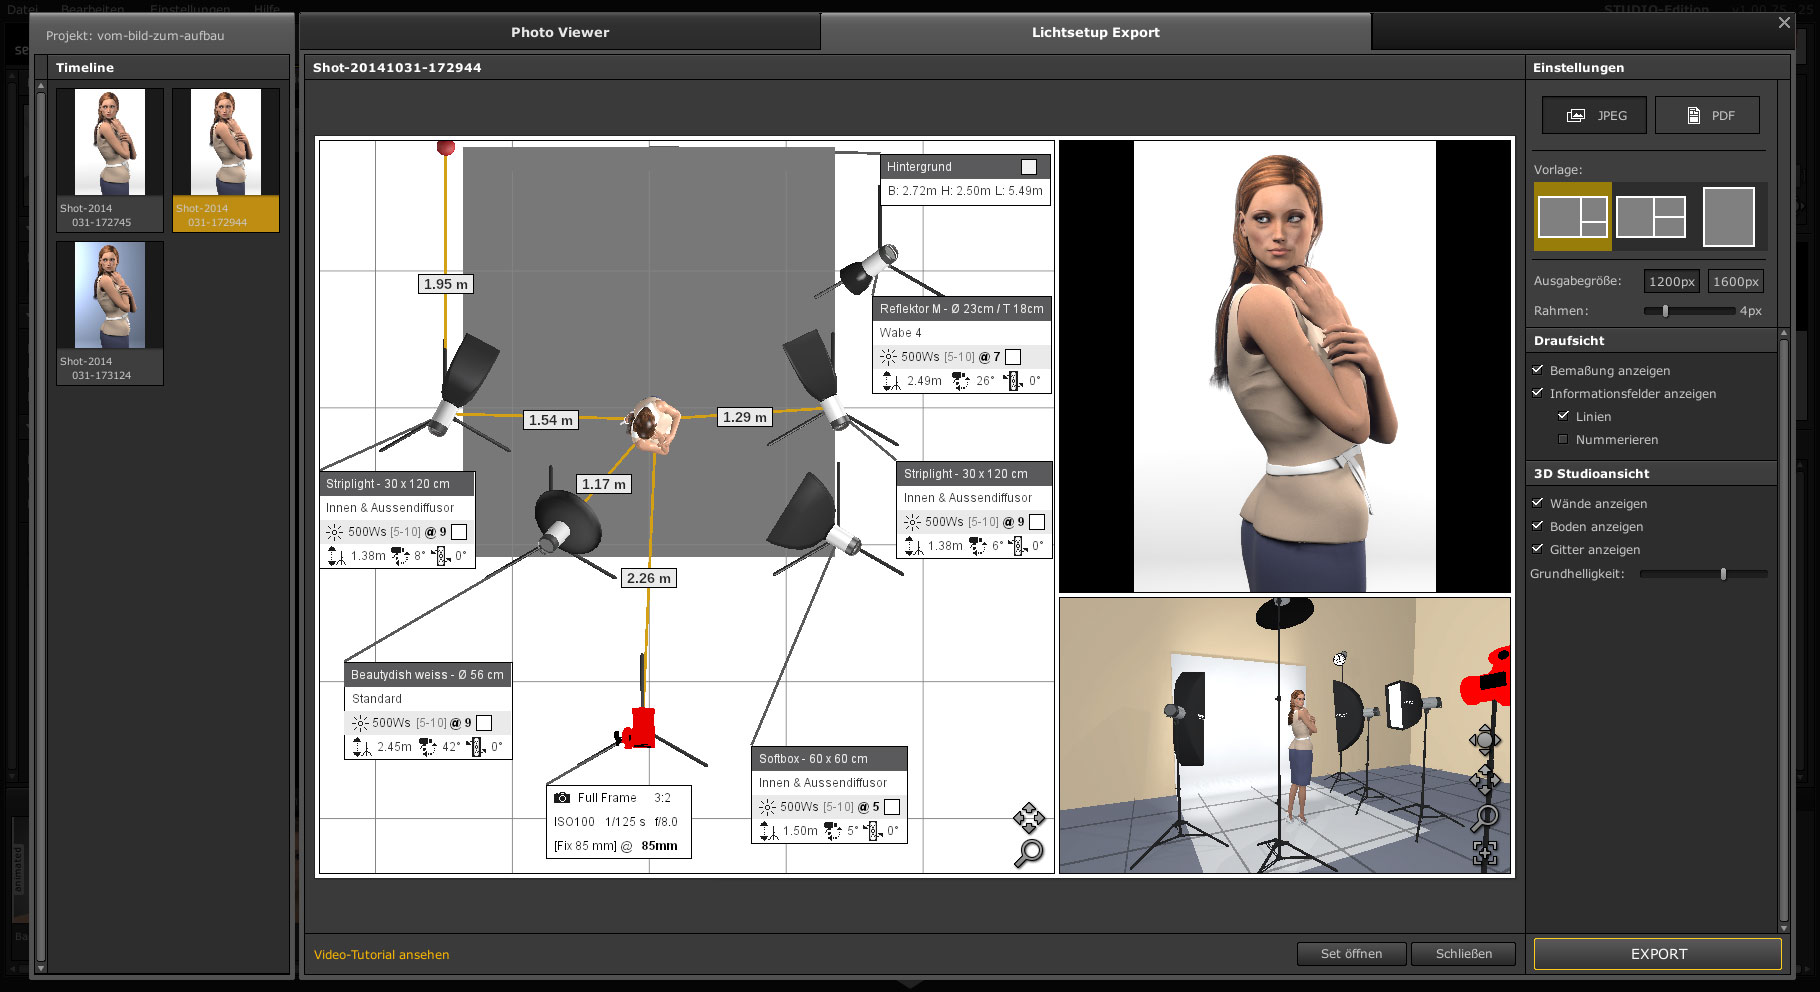
After everything is set to your satisfaction, you switch to the Set Plan Exporter. Here you will be able to draw optional dimension lines. They will facilitate the studio setup later on. The next step is the PDF export and now you are done with your preparations for your next photo shoot.
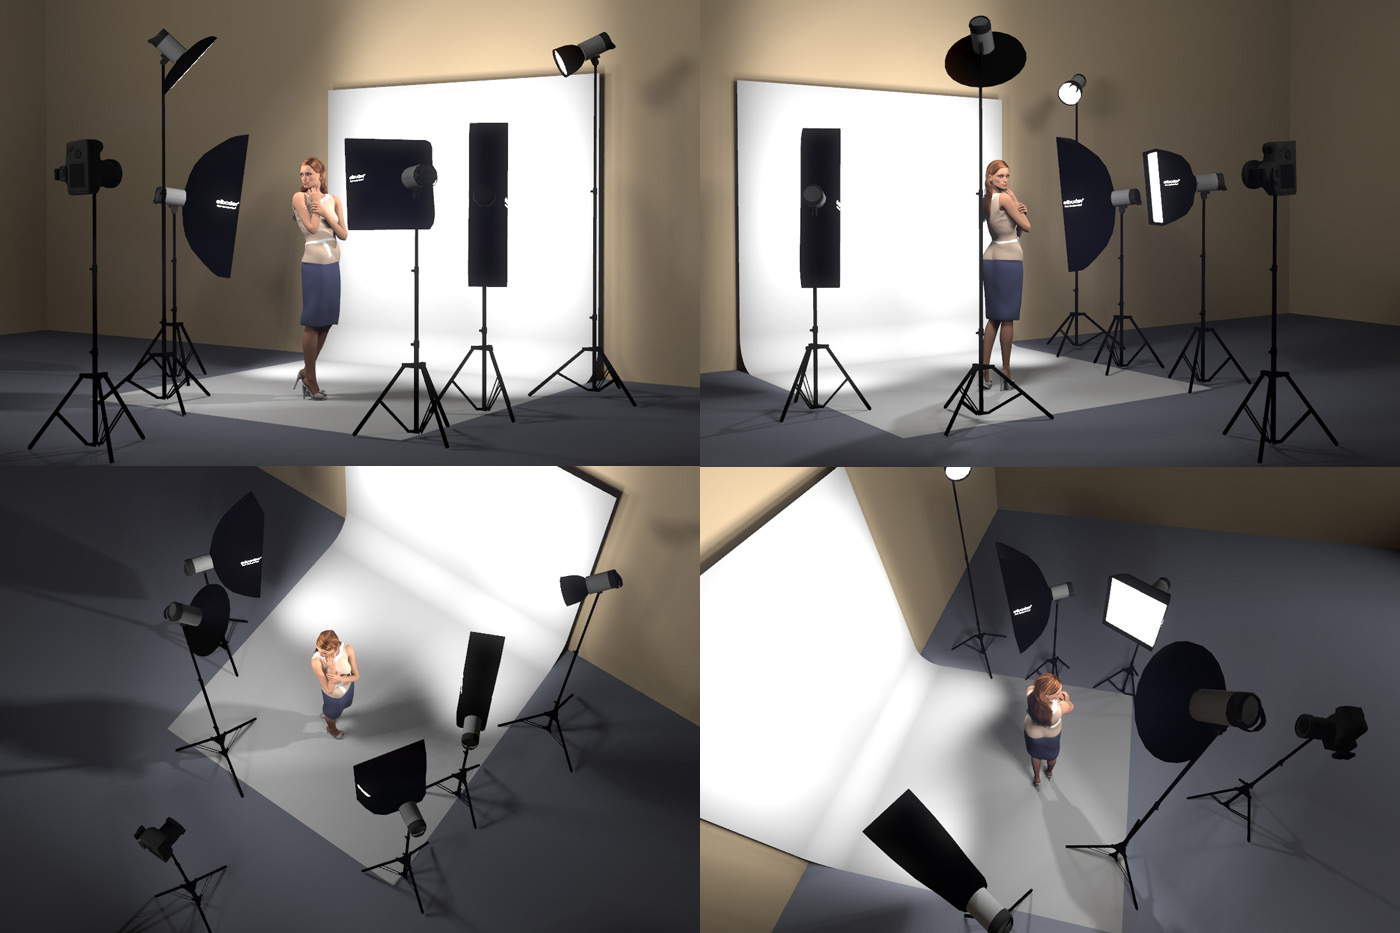
Making Of Aufnahmen des Freisteller Portrait Lichtaufbaus
Subsequently, it is a good idea to take some “making of” pictures. HIER we have shown you how easily this actually can be accomplished. These images as well as the setup created in the Exporter are, for example, ideally suited for the introduction and in-depth explanation of your own lighting setups in online community forums. Photography newcomers will be especially grateful for receiving support and insights regarding lighting design.
Portraitlight-Studiosetup – Key Light: Beauty-Dish
The set file for your testing purposes can be downloaded right here: DOWNLOAD
The Trial of set.a.light 3D is here: http://www.elixxier.com/de/downloads/
This post is also available in: German