 elixxier – Photo Blog Light settings and lighting structures for studio and outdoor photography. Tips and tricks for set.a.light 3D – The photo studio and light simulation for photographers.

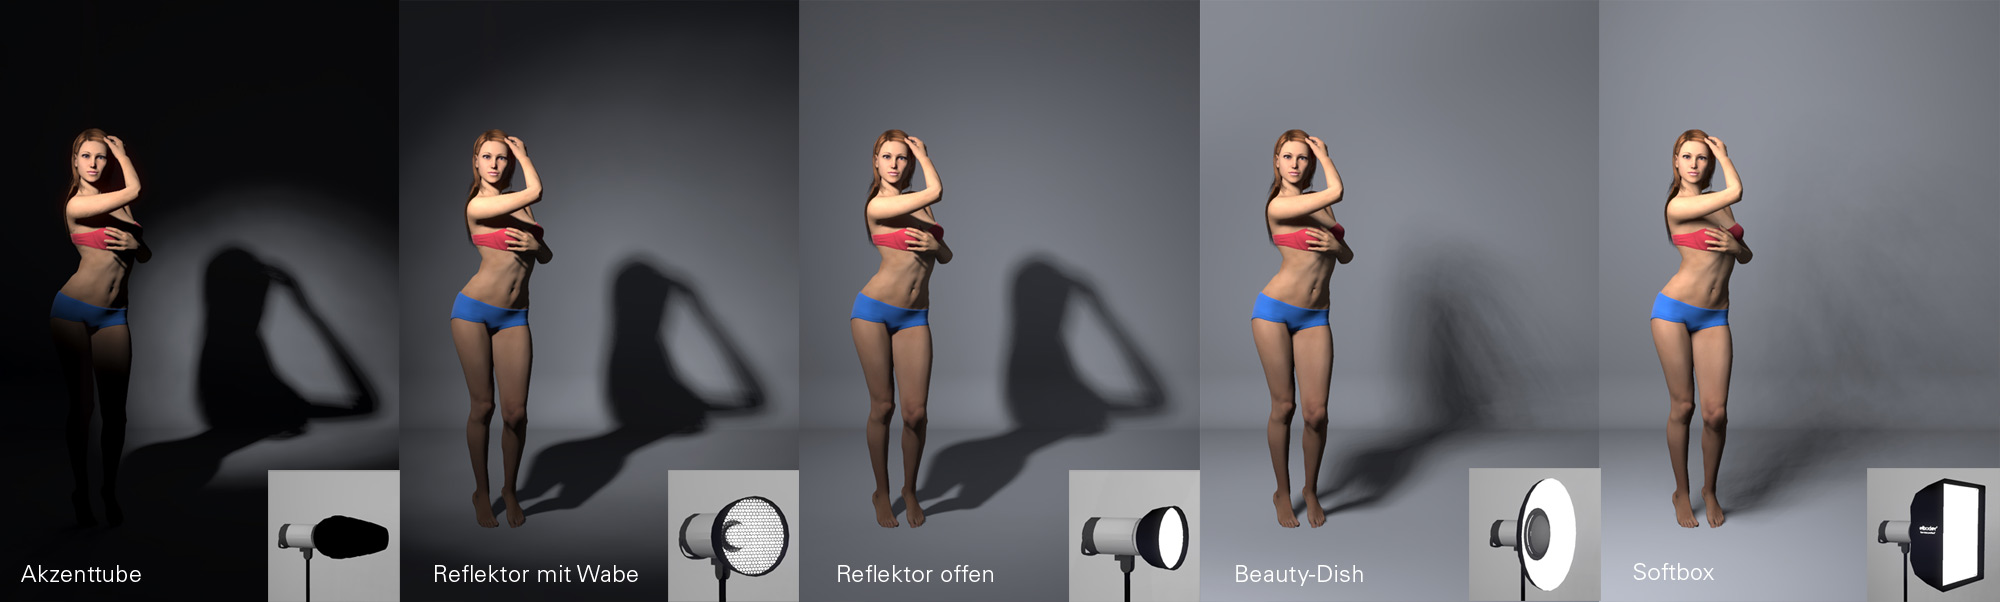
Types of light:
Soft light:
 Soft light, indirect light or also known as diffuse light, is produced through extensive light sources. We know diffuse light from nature, for example sunshine falling through a cloudy sky. A great characteristc of it is its uniform illumination and its minimization of shadows. Their contours are blurry and very soft. In studio photography you would use big softboxes to simualte a sky full of clouds, but its often used in beauty photography.
Hard/directed light:
 The light seems to be very selective, which makes shadows appear harder and their contours get much stronger. Hard light or directed light is emitted by small light sources – it’s just the other way round if you remember the soft light. The distance from the light source to your object plays an important role here. Our sun is the most well-known hard light source, because it is perceived as very small due to its distance to earth, even though we all know it’s huge. Strong contrasts and hard shadows are the most important features of directed light. You would use flashes with reflectors or honeycombs / honeycomb grids in order to simulate the sun in your studio. Its often used i.e. in still lifes to bring more stucture into the pictures, but of course also in fashion photography or portraiture to produce beautiful (sun-like) highlights.

Light formers
SOFTBOX / OCTABOX: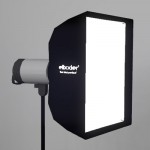
Softboxes emmit a very soothing soft light. They are used in beauty shoots or portraits, because their light is very “flattering” so to say and is able to conceal roughness or uneveness in the skin. Softboxen werden oft bei Beautyaufnahmen und Portraits verwendet, da das Licht sehr schmeichelnd ist und mögliche Hautunebenheiten am besten kaschiert werden. There is a big variety of softboxes that can be used according to meet requirements very well.
REFLECTOR SCREEN / TRANSLUCENT UMBRELLA: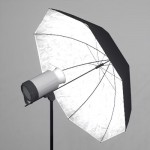
This reflected light, because the flash is used in the direction of the umbrella here. The light is dispensed to the umbrella, which throws it back extensively. Depending on the coating, silver, gold or white, the light has a different temperature. Silver makes it cooler, whilst gold makes the light appear warmer and white is a very neutral component. A silver coating reflects the light stronger than the other ones.
STRIPLIGHT: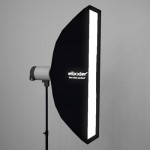
Could be used for portraiture or still life by throwing in a small stray or stripe of light( i.e. on a glass or wine bottle). You’ll like it in fashion or portrait photography, because you’ll be able to highlight the structure of clothing or dresses and bring a more exciting component into the picture. This light former should be available in every studio!
REFLECTOR: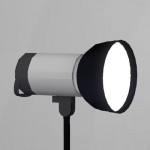
A reflector emmits very hard light: punctual and selective. They are used in product photography for advertising to give a clear picture on the structure of an object or to achieve effect lights. Its also handy as a light for the hair in portraiture or fashion photography (maybe in combination with a honeycomb (grid)).
REFLECTOR WITH HONEYCOME: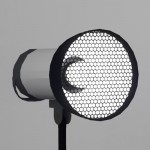
The honeycombs duty is simlar to the accent tube. The light gets more punctual, the shadows are mostly (depending on your comb) hard. The honeycomb is not aimed like the accent tube, but is often used as a highlight / strip light or to set an accent onto something. Another idea: you can produce great color gradients / progressions onto your background of course!
ACCENT TUBE: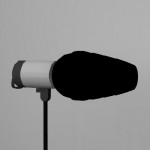
This is a very hard light, even more selective and directed as the other ones. This light former “swallows” approximately one aperture of light (due to its form and the narrow honeycomb sme light is lost). It’s often used to achieve punctual highlights or to set very detailed small accents.
BEAUTY-DISH: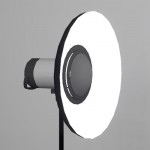
The beauty-dish doesn’t directly emit light, because the flash is covered by the capping tile. A color progression is produceby the curved shape of the beauty-dish. This means the light intensity gets continuously less towards the outside. It combies hard and soft light! We have a picture that has strong contrasts (due to the core in the middle) with the shadows getting softer towards the outside. This seems to be a mix of a softbox with its indirected light and a flash with hard lighting. Available with white and silver coating.
Tip for your own home studio:
As a basic equipment you might use…
– 1 to 2 striplights (i.e. 30x90cm or 30x120cm)
– 1 to 2 reflectors with honeycomb (a rough one and a detailed one)
– 1 Beauty-Dish
– 1 to 2 softboxes (with honeycomb – i.e. 80x100cm)
– 1 octabox (with honeycomb – i.e. 90cm, oder 120cm)
Well, this is a lot, but it’ll give you more possibilities and flexibility with your lighting. It is very helpful to try out these techniques in set.a.light 3D and to get to know them there – and you might want to do this before you buy your equipment. You can test out all the functions of a light former and see how they really work. You’ll be able to a eliminate bad buy s or unnecessary purchases. And by the way: you’ll produce your first light setups with trying out all the features, so be sure to try to implement those in your studio reality later.
We think it’s the ideal tool for beginning with studio photography – but we’d also recommend workshops or a photo course.
Lighting – learn photographing the right way
The most important thing within photography is the light. It’s the biggest factor for a great picture and without it, photography can’t be done. In the following parts we’ll deal with the work with studio equipment, flashes and the tutorials will give a deeper impression of that.
There is no such thing as “wrong lighting”. But if you have the necessary skills with your lighting equipment, you can achieve controlled and good results. The precision of a chosen and controlled lighting style is the thing that makes the picture great. Studio light and many light formers will give you many possibilities and ways set up your ideas. A setup itself is dependant on multiple factors, such as the object (model that is moving, or lifeless object), the light guidance, styling, props, even the atmosphere on set has an influence on the picture.
 The more your experience, the equipment and your knowledge improve, the more complex scenarios can be applied. Lighting is no magic: Light reacts proportional to a square and light formers are there to, as the name says, “form the light”, to give it different shapes. You should ask yourself with every light source: Where does my light come from? Where does it go? What does it do and how does it react? Height, distance and angle from light toe objective are important, just like the type of light you have. Hard, soft, directed, … Dealing with light, doesn’t matter whether in the studio or not, needs a complete understanding of light and shadow. We don’t want to just “switch on the lights” and brighten things a bit up – we want to draw, to design and to form.
In the beginning working with only one flash can be helpful. Even with just one light source you can achieve many different tings and great results. You’ll learn lighting by looking at how different the light behaves if you use different light formers (softbox with diffuser vs reflector). You can try out all of this with set.a.light 3D in your own speed, step by step on your computer. You can get many different and non-comparable atmospheres through the angle of the light or the flash head. If you use more of those later on, you’ll have developed an understanding for light guidance and dealing with your equipment gets easier. You’ll be able to design your setup very nuencad.
If you want to work with more than one light source, it’s helpful to set up each one individually. Do not act too fast (don’t just use the motto “Lights on, here we go!”). Dealing with your main light first is the more effective way. By doing that, you have set the overall lighting atmosphere and you can switch it off again. Continue by positioning your other sources like accent lights. Calmly calibrate them and set them up in the right directions, without having the main light distracting you. Just like that, you’ll see every light source’s effect individually and try to evaluate them. In the end, switch on everything and start adjusting details and change some small things depending on the overall situation.

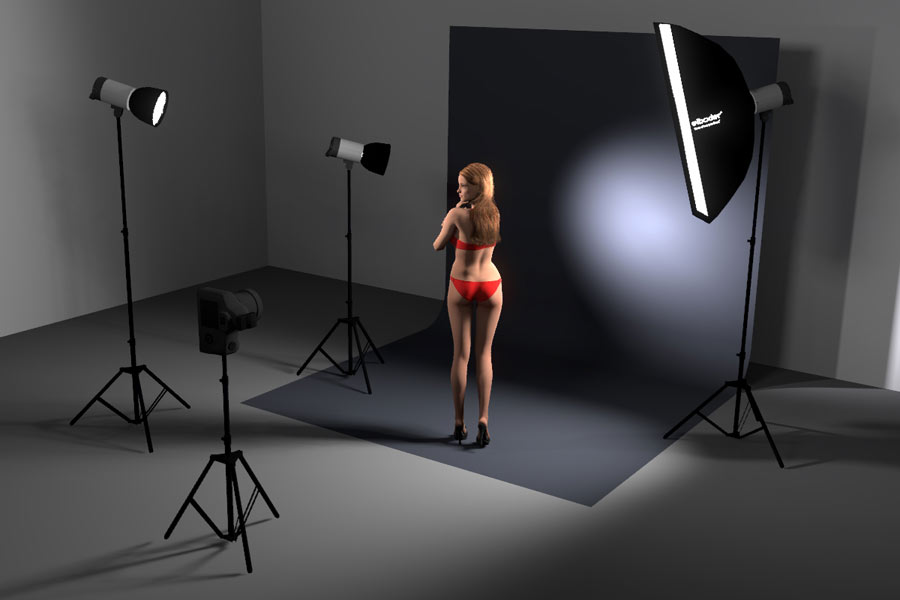
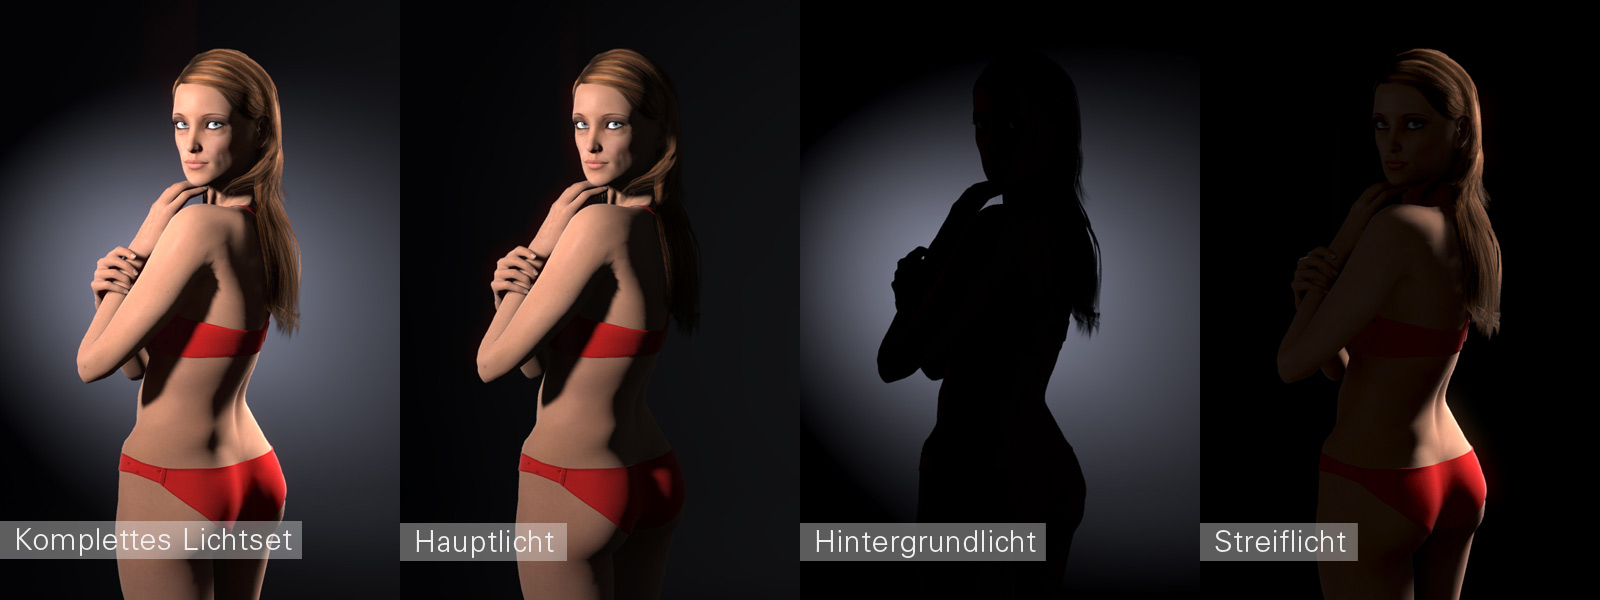
Studio setup of a three-point light setup – reflector (main light), reflector (background light), Striplight – objective: 24-105 mm zoom
Lighting is an important point in the conceptional work of a photographer. The subjective feeling plays a big role here as well, so there is often going to be a spezialization. The light design will be the flagship of a photographer.
You can download the light setup for set.a.light 3D here.
DOWNLOAD: Lighting step by step.
If your browser changes your file ending into a .zip, be sure to correct that. It has to end on .set!!
By the way: You can even watch the file if you didn’t buy set.a.light! You can download set.a.light 3D HERE for free.
And a special tip: By downloading set.a.light, you’ll receive a big photo course for free via E-Mail ;)
In our 4th chapter we’ll deal with “Before your camera goes ‘click’ “.
This post is also available in: German