 elixxier – Photo Blog Light settings and lighting structures for studio and outdoor photography. Tips and tricks for set.a.light 3D – The photo studio and light simulation for photographers.
A great example on how to easily experiment around and learn with set.a.light 3D!
Of course, the .set-file is available down there at the end of the article. Have fun ;)
This week I had a session with a part time model from Gibraltar and while presenting my thoughts for the shoot, I asked her what she would like to do.
She came up with the idea of a coloured portrait and sent me the well known picture from Geoffrey Jones.
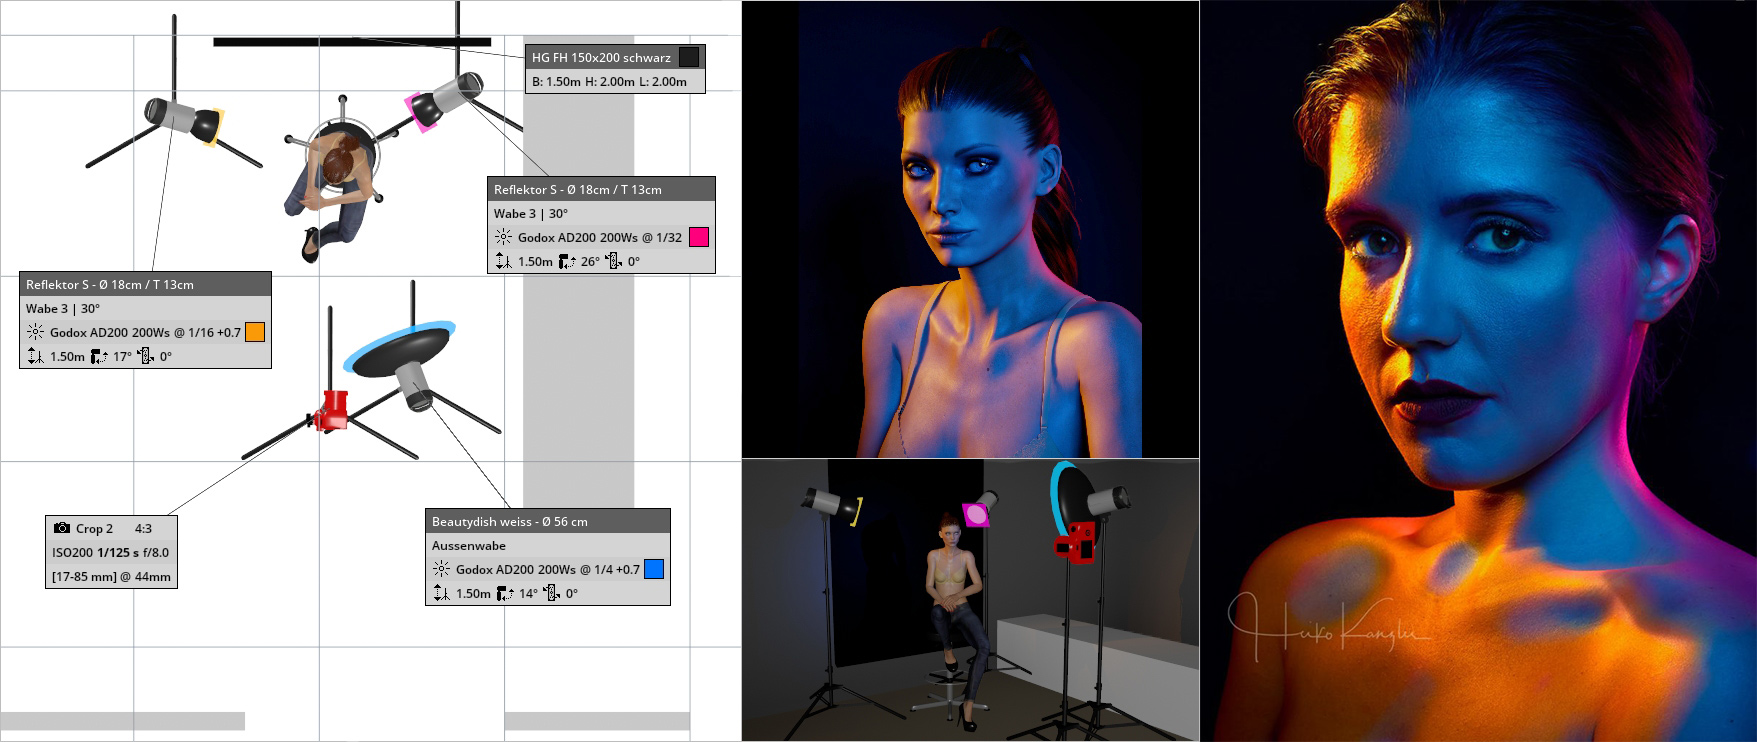
I accepted the challenge, launched set.a.light 3D, looked into Johannes‘ example file from one of his previous live tutorials and created a new set with my own gear in my small “home studio”.
Here is the video, which sadly is only available in German:

- Mit Klick auf das Video, wird eine Verbindung zu Youtube aufgebaut, es gelten damit die Datenschutzbestimmungen von Youtube. -

There have been a number of problems and challenges I had to deal with:
- a very small room with lots of light pollution
- a limited set of gels for my studio strobes (I tried my speedlights as-well, where I have more colour gels, but this type of shot is almost impossible to do without a modelling light)
- to find the ballance between the lights (still an issue)
- the pose (has a huge unfluence on the amount of the different colours on her body)
- saturation, especially for the blues (the picture in camera was washed out and got better after stepped down one and half stops)
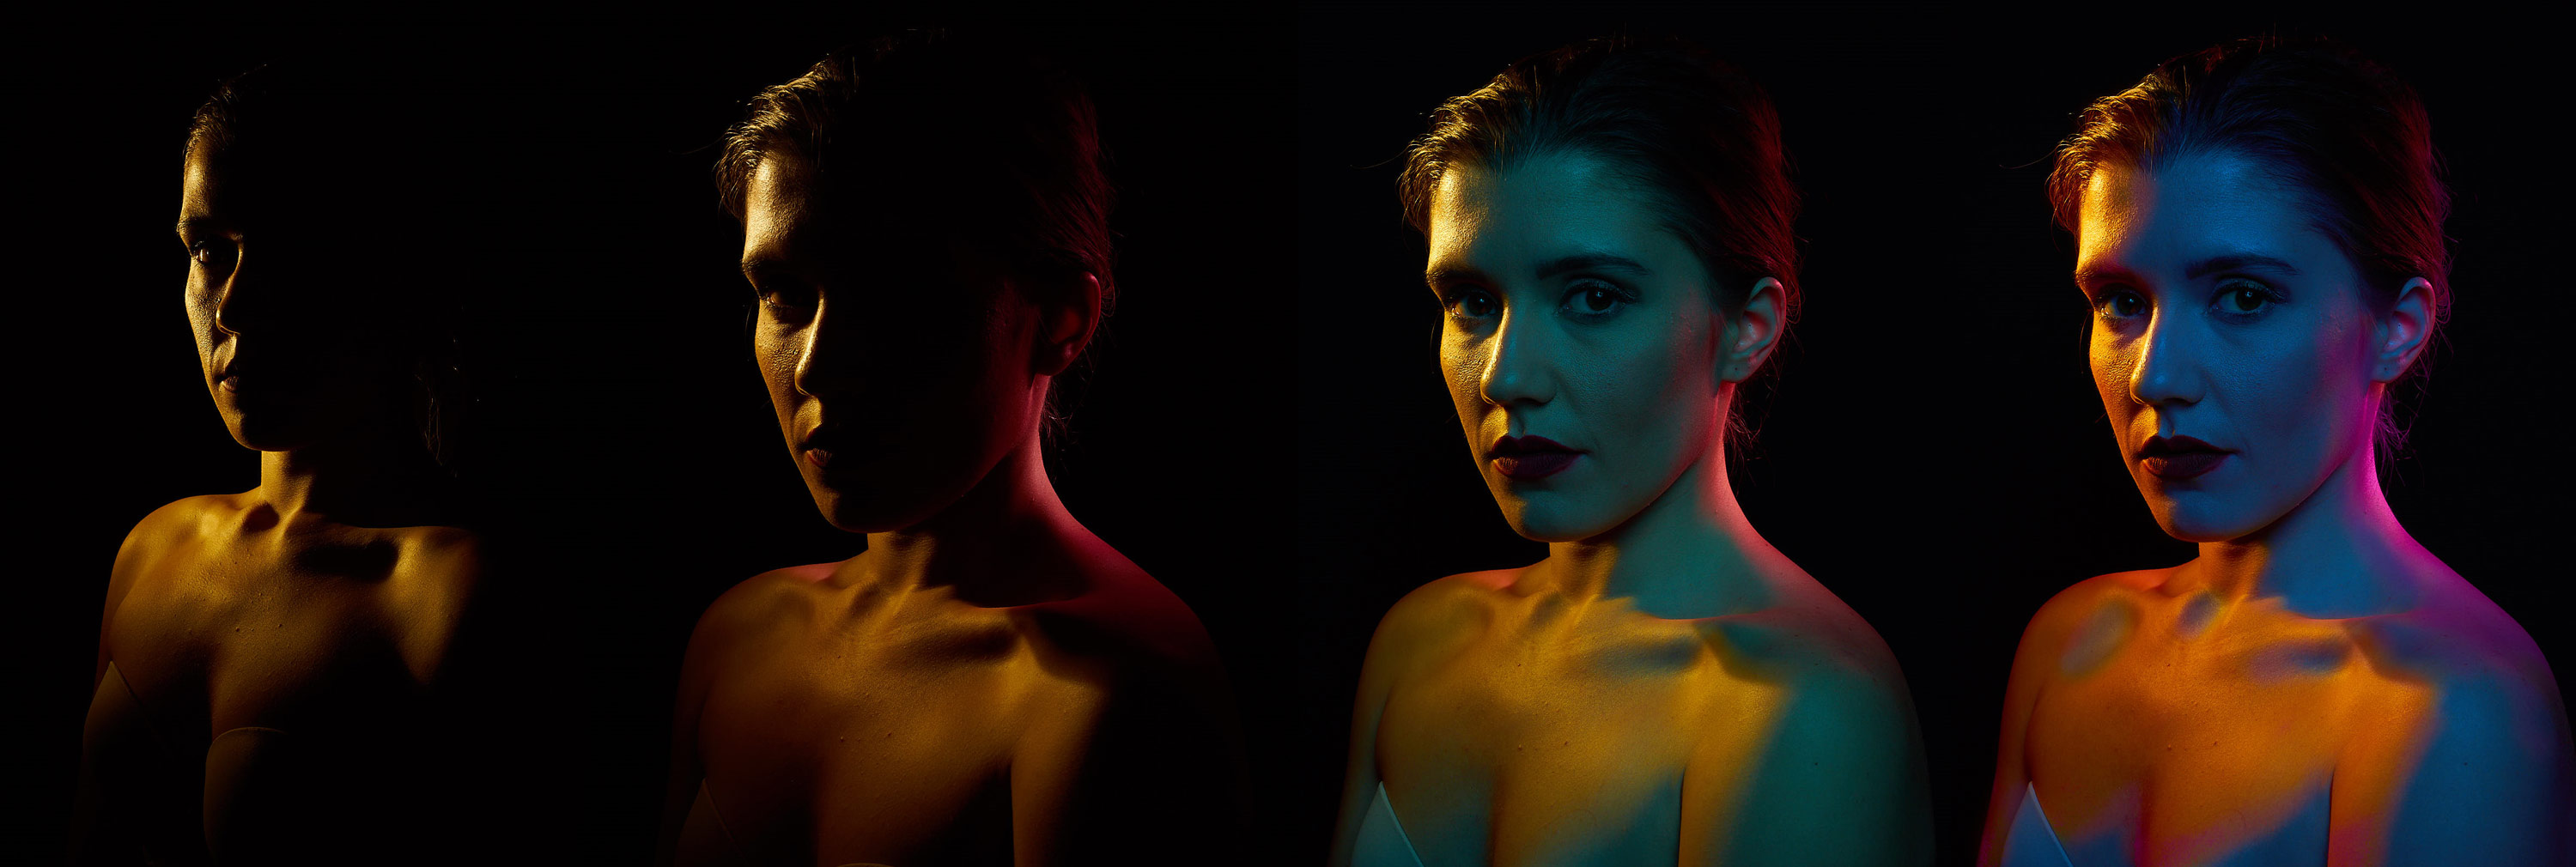
This picture shows a comparison of the first, second and third color (counting from the left) and the colors saturated through Capture One (right)

In post, I used the awesome color editor of Capture One to select the different colors and adjust and saturate them independently.
In Photoshop I then took the final steps like skin retouch, Dodge ‘n’ Burn and global color grading.
Here’s the result – Heiko’s version of Tricolore
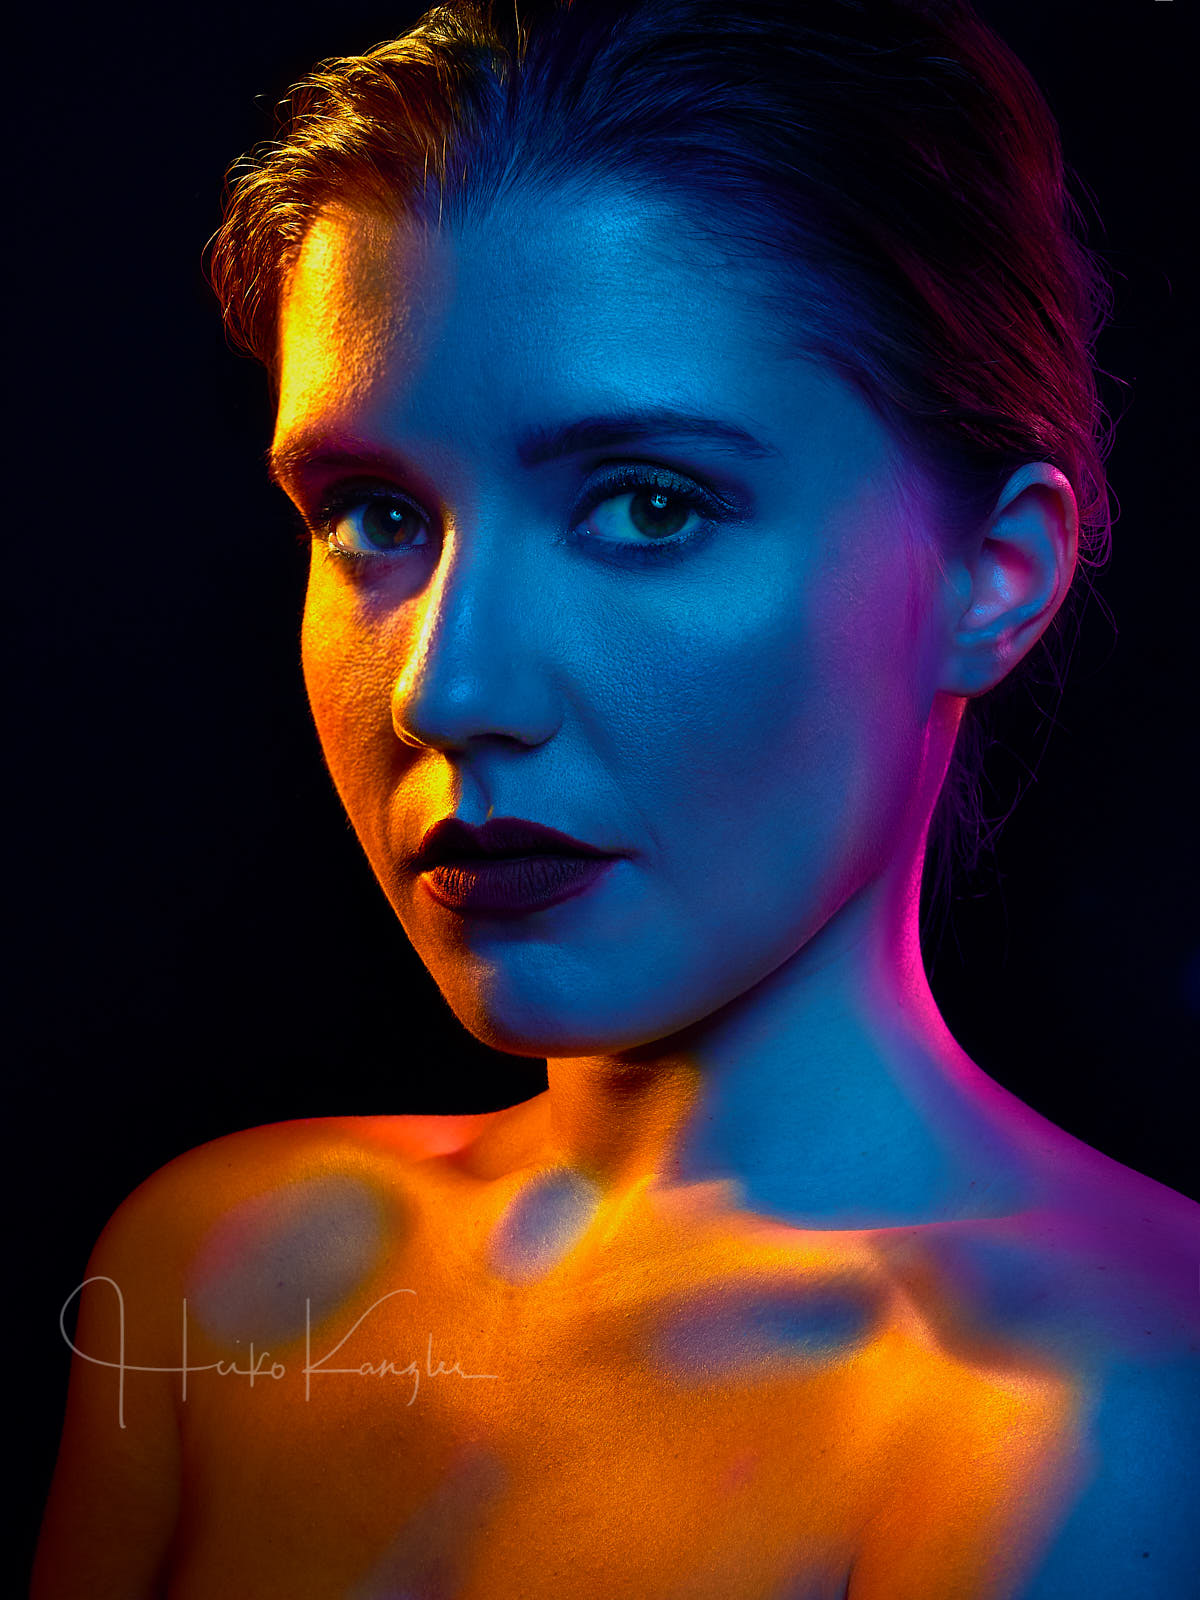
He says:
“The picture is not not perfect, but it’s a start. For me, knowing that I can experiment with set.a.light3D with complex sets or creative ideas and beeing able to reproduce them, was the biggest learning from this session.”
The .set-file for set.a.light 3D is as promised available here.
Download: Geoffrey Jones - 3 colors.set
More of Heiko’s work can be found on his website or his Facebook page.
If you haven’t seen our interview yet, we’d highly recommend you to watch it :)
Quick Links…
–> set.a.light 3D
–> Facebook
–> Instagram
This post is also available in: German